Recipes

Mustard

I love mustard—zesty Dijon; zingy yellow; bitey, coarse, country-style. It is a universal spice—from the seeds cooked in Indian fruit chutneys, to the sinus-clearing fiery paste served with Chinese barbecued pork, to the pungent sweet mustard fruits (that I love so much!) found in Italy. Dijon and rosemary has been a classic smear used on lamb racks for centuries. The climax of the baseball season approaches—and that just calls out for hot dogs slathered with mustard. I know Dijon is tasty, but tangy yellow is just too darn good to ignore in my opinion.

Mustard is a great flavor enhancer. Dijon—once viewed by Americans as the exclusive province of chefs, food snobs and gourmets—has become a staple in the American kitchen. Dijon is a must ingredient in many of my recipes—from classic vinaigrettes to deviled eggs. I often use it to build an extra “layer” of flavor as it can round out the flavors of a dish.

Whole-grain mustard is another great flavor builder, which contributes texture as well: rub it on steaks and roasts or stir it into a garlic cream sauce— it’s good on just about anything! It’s the mustard I’ve included in my Country Mustard Herb Splash, which is terrific tossed with fresh-steamed green beans or just-roasted potatoes, splashed on grilled steaks or chicken, or used as a dredge for grilled or broiled mushrooms. If you love sharp flavors as much as I do, you’ll also like it tossed with a green salad.

Last, but not least, we can’t forget the American yellow mustard—the classic ingredient in a home-style eggy potato salad, spread on bologna sandwiches, or zigzagged across a hot dog of course! Now, if you’ve never tried a Southern-style, yellow barbecue sauce (alias “Mop”), you should! I’ve cooked up a recipe for South Carolina Mustard-Spiked BBQ Sauce—great for making slow-cooked pulled pork or for brushing on grilling ribs or chicken.

And if you’re ever interested in making your own mustard, it’s pretty easy. There are tons of variations, and lots of fun books and recipes you can research on the web. My No. 1 tip would be to remember that the longer your fresh mustard sits the mellower it gets. When it’s first made, it’s gonna be hot!  ©2009 by Kathy Casey Food Studios®

Country Mustard Herb Splash
This big-flavored sauce is great to keep on hand to splash over vegetables such as sautéed zucchini or green beans and to drizzle over grilled chicken, fish or meats. 

Makes 1 1/2 cups

2 tablespoons whole-grain mustard
1/4 cup sherry vinegar or substitute red wine vinegar
1/2 teaspoon salt
1 cup extra-virgin olive oil
2 tablespoons thinly sliced fresh chives
2 tablespoons chopped fresh tarragon or basil
1 teaspoon very finely minced fresh thyme
1/2 teaspoon freshly cracked black pepper

In a large bowl, whisk together mustard, vinegar, and salt, then gradually whisk in oil, emulsifying mixture. Stir in herbs and seasonings. Store refrigerated for up to 2 weeks.©2009 by Kathy Casey Food Studios®

South Carolina Mustard-Spiked BBQ Sauce
Makes 1 3/4 cups

1/2 cup prepared yellow mustard
1/2 cup brown sugar
1/2 cup cider vinegar
1/2 cup beer
1 tablespoon Worcestershire sauce
2 teaspoons hot sauce
1 teaspoon chili powder
1/2 teaspoon black pepper
1 teaspoon liquid smoke

Whisk all ingredients together. Store refrigerated.
To use: Paint sauce on ribs or chicken frequently (about every 10 minutes) during cooking or pre-marinate pork roasts overnight before roasting. ©2009 by Kathy Casey Food Studios®

Posted by Kathy Casey on October 8th, 2009  |  Comments Off on Mustard |  Posted in Dishing with Kathy Casey Blog, KOMO Radio, other, Recent Posts, Recipes

Brownies – An All American Favorite

clip_image001

Homemade  brownies and bars—yum! These days—what with everyone working so much—time spent baking really can be regarded almost as a luxury. But whether you are tight on time or have a little extra, I’ve got a recipe for you to try.

The first one REALLY takes not more than 10 minutes to prepare and then about a half-hour to bake. It uses a rich, fudge brownie mix that is embellished with lots of cut up maraschino cherries, broken up chocolate wafers, and walnuts—and then the whole thing is drizzled with that magic baking ingredient, sweetened condensed milk. Makes for a yummy chocolate cherry brownie with lots of “goodies” poking out of it.

Brownies are classic but I also love a great bar—“bar cookie” that is. The recipe for Caramel Triple Nut Bars takes a bit of extra work and skill but is worth it. You make the crust layer first then, while it’s cooling, you make the caramel layer, so no fancy footwork is required to get the timing right. But you do need to use a candy thermometer. The top layer calls for butterscotch morsels; however, chocolate-lovers can use half butterscotch and half chocolate or all chocolate if you insist.
©2009 by Kathy Casey Food Studios®

Quick Chocolate Cherry Brownie Jumble
Makes 16 brownies

 1 box (21 oz) fudge brownie mix
2 eggs
1/4 cup water
1/2 cup vegetable oil or melted butter
16 chocolate cookie wafers, broken into large pieces
1 (10–12 oz) jar maraschino cherries, drained and halved
1/2 cup chocolate chips
3/4 cup chopped walnuts (optional)
3/4 cup sweetened condensed milk (not evaporated milk) 

Preheat oven to 350 degrees F. Grease a 9”x13” baking pan. Mix brownie mix, eggs, water and oil in a large bowl until well blended. Spread batter in greased pan. Scatter top of batter with cookie pieces, cherries, chocolate chips and walnuts. Drizzle with condensed milk. Bake for about 35 minutes or until topping is golden. Let cool and then cut 4×4 into 16 pieces.

Baker’s Note: If using a glass baking pan, increase cooking time to 40 minutes. ©2009 by Kathy Casey Food Studios®

Caramel Triple Nut Bars
Makes 48 bars

1 cup walnuts, coarsely chopped
1 cup pecan halves, coarsely chopped
1 cup hazelnuts, coarsely chopped

Dough
1 1/4 cups all-purpose flour
3 Tbsp sugar
1/2 cup (1 stick) salted butter, cut into chunks
2 Tbsp heavy cream 

Caramel Layer
1 cup heavy cream
1/3 cup light corn syrup
1/4 cup (1/2 stick) butter
2/3 cup packed light brown sugar
2 tsp vanilla extract
2 cups (12 ounces) butterscotch morsels, or a mixture of 1 cup butterscotch morsels and 1 cup chocolate chips

Preheat oven to 350 degrees F. Lightly grease or coat a 9”x13” baking pan with nonstick spray. Line the pan with aluminum foil, letting foil overhang the two narrow ends by about 2 inches. Spray the foil with nonstick spray. Mix the nuts, spread on a rimmed baking sheet, and toast in the oven until lightly browned, about 6 to 8 minutes. Let cool and set aside. (Leave oven on.) To make the dough: In a medium bowl, thoroughly mix the flour and sugar. Using a pastry blender or fork, cut in the butter until the mixture is the consistency of cornmeal. Sprinkle the cream over the flour mixture. Lightly stir to mix in. Gently knead until the mixture holds together. (The dough can also be done in a food processor.) Press the dough in an even layer into the baking pan. Refrigerate for 20 minutes. Bake in the middle of the oven for 20 to 25 minutes or until lightly browned. When the crust layer is done, set it aside to cool while you make the caramel layer. To make the caramel layer: In a heavy saucepan, thoroughly stir together the cream, corn syrup and sugars. Bring to a boil over high heat, stirring occasionally, for about 5 minutes, or until slightly thickened. Reduce the heat to a simmer and insert a candy thermometer into the mixture, being careful that the tip does not touch the bottom of the pan. Cook, stirring occasionally to prevent burning, until the thermometer reads 245 degrees. Immediately remove the pan from the heat. Stir in the vanilla and 2 cups of the nuts (reserve 1 cup for sprinkling over the top later) then immediately spread the caramel-nut mixture evenly over the baked crust, all the way to the edges. Immediately sprinkle the morsels evenly over the caramel layer. Let the morsels melt, then, using a table knife, spread the melted morsels over the caramel layer. Sprinkle the remaining nuts over the melted morsels, pressing in lightly. Refrigerate until completely cooled. Using the overhanging foil as handles, transfer the slab to a cutting board. Carefully peel off and discard the foil. Using a large knife, cut the slab into 48 bars. Store in an airtight container for up to 1 1/2 weeks. ©2009 by Kathy Casey Food Studios®

Posted by Kathy Casey on October 1st, 2009  |  Comments Off on Brownies – An All American Favorite |  Posted in dessert, Dishing with Kathy Casey Blog, KOMO Radio, Recent Posts, Recipes

Back To School (and Work) Quick-Start Breakfasts

Fall is here and that means back to school and work. For adults and kids alike, fall also usually means on-the-go breakfasts.

Of course many will acknowledge that a little something in the morning will get you going and help jump-start your metabolism, too. And some of those old-time breakfast favorites can be sooooo good. But, admit it, most of us really don’t make the time to cook up breakfast — other than perhaps a quickie bowl of cereal — very often.

These breakfast ideas may be a bit more prep-intensive than shaking out some cereal into a bowl, but you’ll soon see they don’t take much time at all in the morning if you do most of the preparation the night before.

I’ll bet that a lot of you stop for some version of a “McBreakfast” sandwich. But did you know purchased uncooked biscuit dough makes a base for some delish homemade breakfast sandwiches? And, really, who doesn’t love to whack that roll on the counter and see it puff up! The dough is filled with scrambled eggs, cheese and other goodies such as pesto, shrimp, pre-cooked bacon or sausage if you like, then sealed all around the edges and baked. Yum! Savory, hot breakfast to go. These also hold up to filling the night before or even baking ahead of time and reheating in the microwave — but cooked hot and fresh is definitely best!

Pair any breakfast with a nice, fresh fruit skewer with Sunny Orange Dip. You have a fun-to-eat and nutritious fruit to munch on the run.

And I’m sure many of you are eating those energy breakfast bars, so why not try making your own? It’s not much harder than whipping up a batch of Rice Krispie Treats. But mine are loaded with just a ton more good-for-you goodies – fruits, nuts… the list goes on. If you like the idea of adding some mini chocolate chips, go ahead! Sunflower seeds, flax seeds, peanut butter…okay! Make a big batch on Sunday night and then keep them in an airtight container. Voila! Grab-and-go breakfast or snack for you and the kids.

Smoothies are also a great and easy meal-on-the-run too! No muss, no fuss and deliciously  healthy too! Try my recipe below or get creative and start tossing stuff in the blender!

So don’t limit yourself to just cold cereal for breakfast — give yourself and your family something new to get your days going this fall. Copyright © 2009 by Kathy Casey Food Studios®

Fluffy Stuffed Biscuits
Make 4 servings

1 tube of 8 large, uncooked, refigerate buttermilk biscuits, such as Pillsbury Grands
4 eggs, beaten
1/4 teaspoon salt
1/8 teaspoon pepper
3 tablespoons reduced-fat cream cheese
1/4 cup grated cheddar cheese

Fillings:
4 slices bacon, cooked crispy and then coarsely chopped
Or
1/2 cup raw, bulk breakfast sausage, cooked, and then crumbled
Or
1/3 cup bay shrimp, drained well
Or
2 tablespoons chopped roasted red peppers or sautéed mushrooms
Or
your favorite  pesto, such as Cibo

sesame seeds, optional

Preheat oven to 375 degrees F. Beat eggs with salt and pepper. Lightly coat a small non-stick skillet with cooking spray. Heat over medium-high heat; add eggs to the pan and stir gently to scramble until soft and just set. Do not chop up the eggs. Cool and reserve. In a small bowl, mix cream cheese and grated cheddar until evenly combined. Lay out biscuits on a cutting board or clean work counter, and press each one out to 4-inch diameter. On each of 4 biscuits, place 1/4 of the scrambled eggs, leaving a clean 1/4-inch to 1/3-inch margin all around. Top each egg portion with 1/4 of the cheese mixture, then with your choice of either 1/4 of the bacon, sausage or shrimp or 1 1/2 teaspoons red pepper pesto, being sure to keep the dough margins clean. With fingertips lightly moisten the margins with water, then place another biscuit over each mound of filling, lining up the edges and shaping to cover filling evenly. Pinch or crimp the edges together all the way around to seal thoroughly. Place biscuits 1 to 2 inches apart on ungreased cookie sheet. If adding sesame seeds, brush biscuit tops very lightly with water, then sprinkle with sesame seeds and press seeds lightly into the dough. Bake biscuits in preheated oven for about 14 – 15 minutes, or until golden brown.

Chef’s notes:
Biscuits may be baked the night before, cooled and refrigerated, then reheated next morning in the microwave for about 45 seconds to 1 minute, or until heated through.
Or the biscuits may be assembled on the cookie sheet, then refrigerated, tightly covered with plastic wrap, overnight. Let biscuits come to room temperature while oven is preheating, and bake next morning.
This is a good recipe to use up leftover cooked breakfast meat, such as sliced link sausage, ham or bacon. Copyright © 2009 by Kathy Casey Food Studios®

On-the-Go Energy Bars
Try adding in 1 tablespoon of flax seed or peanut butter.
Makes 6 bars

Dry Ingredients

1 cup  multi-vitamin flake-type dry cereal, such as Kellogg’s Special  K
2 cups crispy rice dry cereal, such as Rice Krispies
1/2 cup salted roasted mixed nuts, coarsely chopped
1/4 cup raisins, coarsely chopped  (or dates)
1/4 cup coarsely chopped dried apricots
1/4 cup coarsely chopped dried cranberries
1/3 cup dried non-fat milk powder

Wet Ingredients

3 tablespoons orange juice concentrate, undiluted
1 packet tangerine Emer’gen-C™ *
1/4 teaspoon ground cinnamon
1/4 teaspoon ground nutmeg
1 tablespoon orange zest (optional)
1 1/3 cups mini marshmallows

Preheat oven to 325 degrees F.Combine dry ingredients together in a large bowl and mix evenly. Stir together the orange juice concentrate, tangerine Emer’gen-C packet, cinnamon, nutmeg and orange zest in a small microwavable bowl. Then stir in marshmallows. Microwave on high for about 30 seconds to 1 minute, depending upon your microwave. Stir. Marshmallows should be super puffed and melt when stirred. If not, microwave for 10 – 30 seconds more or as needed. Immediately add to dry ingredients and QUICKLY blend until mix begins to stick into a ball. Quickly dampen your hands in cold water and divide mixture into six heaping 1/2-cup size balls. Then flatten and form into hockey puck-shaped rounds, about 3/4 – 1 inch thick by 2 1/2 – 3 inches in diameter, dampening your hands as necessary to prevent mixture sticking to them. Place bars on ungreased cookie sheet and bake in preheated oven for about 8 minutes, turn bars and bake about 8 minutes more, until crisp on the outside. When thoroughly cooled, remove from pan with metal spatula. May be stored airtight at room temperature for up to 1 week. Copyright © 2009 by Kathy Casey Food Studios® 
* Emer’gen-C™ is a vitamin powder supplement; it is available in small packages at most health departments & food stores or Fred Myers.

Fresh Fruits Skewers with Sunny Orange Dip
Makes 8 skewers and 1 1/3 cups of dip

8 10-inch wooden skewers or straws
16 large strawberries
16 large chunks fresh pineapple
16 large chunks apple or melon
16 fresh mint leaves (optional)

Dip
1/4 cup orange juice concentrate, undiluted
1 cup sour cream (regular, lite or non-fat)
2 tablespoons honey

Mix dip ingredients together well. Reserve. Thread skewers with 2 pieces of each kind of fruit, alternating berries, pineapple and apple/melon chunks, and mint leaves if using. Serve with dip. Copyright © 2009 by Kathy Casey Food Studios®

Super Antioxidant Blueberry Smoothie

Makes 1 serving

1/2 cup fresh blueberries
1/4 cup pomegranate juice
1/4 cup plain low-fat or fat-free yogurt
1 tablespoon honey
1/2 cup ice

Combine all ingredients in a blender and process until smooth. Serve immediately. Copyright © 2009 Kathy Casey Food Studios®

Posted by Kathy on September 24th, 2009  |  Comments Off on Back To School (and Work) Quick-Start Breakfasts |  Posted in breakfast, Dishing with Kathy Casey Blog, KOMO Radio, Lifestyle, Recent Posts, Recipes

Cupcakes – Everybody Loves ’em!

Shirley_Temple_Cupcakes

Who doesn’t love cupcakes?! They’re portable, versatile, celebratory, easy to make and even easier to eat! Cupcakes are pretty much the cat’s meow in the world of sweets these days.

If you want to make ’em yourself, Chronicle Books has put out a Cupcake Kit with everything you need to get started—the kit includes super-cute baking liners, a pastry bag with piping tips, and a 64-page booklet chock-full of tips, tricks and 14 mouth-watering recipes by noted cookbook author Elinor Klivans.

image001

And if there’s an aspiring “really young” baker in your life, check out the Girl Gourmet Cupcake Maker that makes cupcakes in 30 seconds! There’s even a fun little “old-school style” commercial to watch on them. The Cupcake Maker’s kind of like the Easy Bake Oven, but quicker. You can nuke your cupcakes for 30 seconds then whip up the frosting and put it in the frosting spinner. Voila! Offered in 4 different flavors, each Cupcake Maker comes with mixes, frostings, cupcake cups and sprinkles. We “whipped up a batch” and—though kinda fun—they do taste like they took 30 seconds to make. There’s no substitute for the real thing … but this can be a great start to getting the little ones curious about making things themselves.

image004
Ready to Microwave 

image006
Pump on the Frosting

image008
Sprinkle with Fun

Now speaking of kids—and things kids love—my gal pal Cheryl Kroupa at the Cherry Foundation asked me to come up with some fun maraschino cherry recipes. I know you all have a jar of these cherries somewhere in your pantry or fridge and might not know what to do with them other than plop onto a sundae, toss into a Manhattan or garnish a Shirley Temple … well that’s an inspiration! Shirley Temple Cupcakes! Quick, easy and fun to make with the kids. Chef Cameo and I whipped some up—we loved them and sampled a few … okay, maybe more than a few. Just looking at them will make you smile! (Recipe follows.)

image009
Kathy & Cameo whipping up some Shirley Temple Cupcakes

Now, if you just want to go buy some super-tasty cupcakes, there certainly are a lot of delicious choices out there—from Trophy Cupcakes to Jody Hall’s Cupcake Royale! And Jody’s just opened her 4th location—this one on Capitol Hill (1111 E. Pike Street)—which, like its sister shops in Madrona, Ballard and West Seattle, is open daily. Most recently I enjoyed a pink frosted cupcake and a few fresh raspberries from my garden for breakfast. So nice … but naughty 😉 Happy cupcakes for all! 

image012
Cupcake Royale Assortment O’ Cakes

Shirley Temple Cupcakes
This recipe uses about two 10-oz jars of maraschino cherries. Every kid—young and old—will enjoy these easy cupcakes!

Makes 24 cupcakes

1 box (18.25 oz) super-moist white cake mix
1 1/4 cups lemon-lime soda
1/3 cup vegetable oil
3 egg whites
1/4 cup chopped maraschino cherries (about 12 cherries)
—————————————
1 container (12 oz) white frosting
Garnish: 36 maraschino cherries, halved

Heat oven to 350 degrees F. Line 24 cupcake cups with paper liners and set aside. Combine the cake mix, soda, oil and egg whites in a large mixing bowl. Blend with an electric mixer on low speed for 30 seconds. Stop and scrape the sides of the bowl and then mix on medium speed for 2 minutes. Fold in the chopped cherries. Fill each lined cupcake cup 3/4 full with batter. Place pans in oven on a lower rack. Bake for about 15 – 20 minutes. Cool completely before frosting. Frost cupcakes and decorate each with 3 cherry halves. Created by Kathy Casey Food Studios for the National Cherry Foundation.

Posted by Kathy on September 17th, 2009  |  Comments Off on Cupcakes – Everybody Loves ’em! |  Posted in dessert, Dishing with Kathy Casey Blog, KOMO Radio, Recent Posts, Recipes

Kathy Casey’s Tropical Summer Patio Party

lei

 The Menu:
Passion Fruit Rum Punch
Avacado & Pineapple Salsa with Taro Root Chips or White Corn Tortilla Chips
Bib Lettuce Salad with Toasted Macadamia Nuts, Papaya, and Lychee Vinaigrette
Grilled Baby Back Ribs with Mango Ginger Glaze
Coconut Scallion Rice
Make Your Own Ice Cream Sundae

“Tropical” is such a fun theme for a summertime deck or patio party. Bright colors, flowers, tikis, lanterns, tall iced drinks are festive all on their own, but add a delicious warm-weather menu and you’ll be hula-ing on the terrace in no time.

Those that read me often know, my whole entertaining philosophy is, “do as much as you can in advance,” and this is a perfect example of a menu that lets you do just that. (Be sure to read through the recipes to see what you can do a few days in advance)

The nice thing about this menu is that everything can be prepped ahead of time and then just assembled. The cocktail premixed; salsa ingredients chopped and then mixed right before serving. Salad dressing and greens prepared ahead and then just tossed to combine. Rice can be made the day before and reheated; ribs just heated and glazed on the q. And dessert couldn’t be easier – or more delicious.

For libations, we started with a delightful drink, Lilikoi Rum Punch—a blend of passion fruit nectar, fresh lime juice, pineapple juice and spiced rum served over ice. You can stir up a tasty non-alcoholic version as well, omitting the rum and mixing in a splash of soda water. To accompany the punch whip up a quick and easy a pineapple avocado fruit salsa served with Taro Root Chips or with white corn tortilla chip for scooping.

While your guests are nibbling head for the grill to start finishing off the Grilled Baby Back Ribs with Mango Ginger Glaze which are pre-prepped by marinating for a day, slow-roasting till tender, and then chilled. A glaze is made by reducing the flavorful mango marinade; the precooked ribs are reheated on the grill while being basted with the glaze till golden and sticky! Serve the ribs up with Coconut Scallion Rice and a tender lettuce salad dressed with toasted macadamia nuts, fresh papaya, and lychee vinaigrette. Yum!

And for dessert – pick up a couple of pints of tropical-flavor ice cream such as Häagen- Dazs pineapple coconut and mango ice creams, some good caramel and chocolate sauces as well as Trader Joe’s Dark Roasted Pistachio Toffee, some candied ginger and a few edible flowers to let guests create their own ice cream sundae with toppings.

A phrase I learned on a tour bus in Hawaii when I was eight years old has stuck in my head for ever!: wiki wiki. It means quick quick. With all this meal readied in advance, that’s what it will be when you serve your guests. So put on your tackiest and brightest alohawear, grab some friends and neighbors, put on some Don Ho and have a tropical party of your own this summer! ©2009 by Kathy Casey Food Studios®

Passion Fruit Rum Punch
Makes 10 – 12 servings

3 cups Looza passion fruit nectar
1 cup fresh lime juice
2 cups pineapple juice
1 bottle spiced rum
soda water as needed
Garnish: lime wedges, edible flowers, or drink parasols

In a large pitcher, combine all ingredients. Refrigerate until ready to serve. To serve: Fill rocks or tall glasses with ice and pour in rum punch. I like to add a little splash of soda water to lighten the drink a bit. Garnish and serve. ©2009 by Kathy Casey Food Studios®

 Avocado & Pineapple Salsa
Note: you can mix in tiny bay shrimp or chopped cooked large prawns to make a shrimp salsa variation- just up the amount of lime juice and sweet thai chili sauce.
Makes about 8 servings

3 Tbsp. fresh lime juice
3 -4 Tbsp. thai sweet chili sauce*
1 tsp. kosher salt
1/4 cup minced red onion
3 cups finely chopped, ripe fresh pineapple
1/2 cup finely diced red bell pepper
2 large ripe but firm avocados
1/2 cup coarsely chopped fresh cilantro
For dipping: crostini, corn tortilla chips, taro root chips or other fun dipables

* Available from well-stocked supermarkets and Asian grocers. Have all ingredients except avocados cut up and measured before assembling. In a large bowl, combine the lime juice, thai sweet chili sauce and salt till well mixed. Add the onion, pineapple and bell pepper.

Quarter and peel avocados, then cut into small dice and add to the salsa along with the cilantro. Lightly and gently fold all ingredients together till well combined. Refrigerate for up to 30 minutes before serving or serve immediately. Serve in a bowl with a spoon on a platter surrounded by chips and/or other dipables. ©2009 by Kathy Casey Food Studios®

 Bibb Lettuce Salad with Toasted Macadamia Nuts, Papaya, and Lychee Vinaigrette
Makes about 8 servings

2 -3 large heads Bibb or other butter lettuce
1 (20-ounce) can lychees in syrup*
1/2 cup canola oil
2 Tbsp. rice wine vinegar
2 Tbsp. fresh lime juice
pinch cayenne pepper
1/2 tsp. kosher salt
2 large ripe papayas, peeled, seeded and cut in cubes
1 cup macadamia nuts, lightly toasted and coarsely chopped (be sure to get the salted nuts!)
 * Available from well-stocked supermarkets and Asian grocers.

To prepare the greens: Cut off the root ends of the lettuce and remove any bruised outside leaves. Rinse lettuce and spin dry. Tear larger leaves into pieces. Wrap prepared lettuce in paper towels, place in a large zip-style plastic bag and refrigerate. You can do this up to 2 days ahead.

To make the vinaigrette: Drain the lychees and reserve the syrup. Cut or tear the lychees into quarters and set aside. In a small bowl, whisk together the oil, vinegar, lime juice, cayenne and salt. Stir in 2 Tbsp.s of the reserved lychee syrup and the lychees. Cover and refrigerate for up to 2 days before serving. (Extra lychee juice is great mixed with soda water for a refreshing non-alcoholic drink.)

To serve the salad: Whisk the dressing to remix well. Place the greens in a very large bowl. Drizzle the dressing over the greens and gently toss, coating leaves well. Lay out half the greens on a large platter, being sure to get some of the lychees evenly distributed. Then scatter with half of the papaya and nuts. Lay out remaining greens, distributing lychees, and scatter with remaining papaya and nuts. ©2009 by Kathy Casey Food Studios®

 Coconut Scallion Rice
Makes about 8 servings

2 cups basmati rice, rinsed and drained well
1 Tbsp. oil
3/4 cup thinly sliced green onions
2 cups water
1 can (13 – 14 ounces) unsweetened coconut milk*
2 tsp.s kosher salt
small pinch cayenne pepper
Garnish: thinly sliced green onions
* Available from well-stocked supermarkets and Asian grocers.

Preheat oven to 375 degrees F. Put the very well-drained rice in a 2-quart baking dish, and set aside.A
Heat the oil in a nonstick or heavy saucepan over medium heat. Sauté the green onion lightly, about 1 minute. Add the water and coconut milk and bring to just barely a simmer; do not boil.

Stir the hot mixture into the rice; stir in the salt and cayenne. Seal tightly with foil and bake in preheated oven for about 20 to 25 minutes, or until rice is tender and all liquid is absorbed. Remove from oven and fluff with a fork. Serve immediately or serve at room temperature. If making the morning or day before serving, refrigerate and then reheat in a microwave in a microwavable bowl covered with plastic wrap. Garnish with green onions. ©2009 by Kathy Casey Food Studios®

 Grilled Baby Back Ribs with Mango Ginger Glaze
Prep the ribs at least one day in advance or up to 3 days ahead. Be sure to read through the recipe before starting
Makes about 8 servings

3 cups mango juice or nectar
3 Tbsp minced fresh ginger
4 cloves garlic, minced
1 cup dry sherry
1/2 cup oyster sauce
1 Tbsp ancho chile powder*
1/4 cup soy sauce
2 Tbsp brown sugar
2 tsp kosher salt
4 racks pork baby back ribs (1 3/4 – 2 pounds each, about 8 pounds total)
1/2 cup spiced rum
2 tsp cornstarch
1 Tbsp water

* Available from well-stocked supermarkets and Mexican grocers
In a bowl, whisk together the mango juice, ginger, garlic, sherry, oyster sauce, chile powder, soy sauce, brown sugar and salt.
Cut rib slabs in half and divide meat between 3 very large zip-style plastic bags. Re-whisk marinade and divide between bags. Press air out of bags and seal. Move marinade around to get all over ribs. Refrigerate ribs overnight or up to 24 hours, turning whenever you think about it.

Preheat oven to 350 degrees F.
Spray a large roasting pan or 2 rimmed baking sheets liberally with cooking spray. Remove ribs from marinade (save marinade to make glaze) and lay ribs out in a single layer in pan(s). Sprinkle meat with rum, cover pan(s) tightly with foil, and roast ribs in preheated oven for 1 1/2 hours or until very tender. When ribs are done, drain off fat, cool and refrigerate ribs, covered, overnight or for up to 3 days.

Meanwhile, transfer marinade to a medium saucepan, bring to a boil over high heat, then reduce heat to low and simmer marinade for about 45 minutes or until reduced to about 2 cups. In a small bowl, whisk together the cornstarch and water, then drizzle into the simmering sauce while whisking continuously. Cook for 1 minute until thickened and remove from heat. Cool and refrigerate until ready to grill ribs.

To grill and serve ribs: Cut each rib section in half—you should now have 16 pieces. Preheat grill to medium and place ribs, bone side down. Brush each rib portion with a little sauce. Cover grill and cook ribs for about 8 to 10 minutes, until that side gets some nice color. Turn ribs over and brush with sauce, cover and cook for 8 to 10 minutes until browned. (If using a gas grill, adjust heat so as to heat and brown ribs but not burn them; if using a charcoal grill, move ribs around as needed.) Turn ribs over one more time and brush again with sauce, cooking for another 8 to 10 minutes until ribs are hot through and nicely browned and glaze is cooked on and sticky. Serve immediately. ©2009 by Kathy Casey Food Studios®

Posted by Kathy on September 3rd, 2009  |  Comments Off on Kathy Casey’s Tropical Summer Patio Party |  Posted in appetizers, Cocktails, Dishing with Kathy Casey Blog, KOMO Radio, Lifestyle, meats, Recent Posts, Recipes, salads

Tomatoes

heirloom

Years ago I wrote about tomatoes, pleading for more people to join me on the Tomato Police. Well, things have certainly improved—so all you tomato-ripening deputies have been doing a good job!

Are you wondering what I am talking about? For a time it was common practice for chefs, restaurateurs and home cooks to—gasp—refrigerate their tomatoes!!! But that is not routine these days.

More vine-ripe varieties are available at the grocery store now—in fact they are almost commonplace. And, in season, we see tomatoes everywhere—from farmers markets to grocery stores—touting local delights! Look for yellow pear and yellow plum; teeny tiny, red currant tomatoes the size of peas; Lemon Boy, the color of its name; Green Zebra; and red-and-yellow-striped Tigerella. And don’t miss the large, purple, beefsteak variety. There is definitely a large assortment to choose from.

If you have a bit of a green thumb, Sweet 100’s are super-easy to grow in flower beds or in pots on the deck. My friend Joani calls them yard candy!

Tomatoes have a plethora of uses—straight from the garden, eaten like a peach; made into relishes, salsas, homemade ketchups … I’ve even seen them used in cakes. Now, I don’t know about that!

And since not all our tomatoes have reached their fully ripe color by the end of the season, I have grown to love them picked green, sliced, coated in a little cornmeal and fried.

And you just can’t have enough salads in the summer! My recipe for Super Summer Tomato Salad with Heirloom Tomatoes, Blue Cheese and Sundried Tomato Herb Vinaigrette is a true tomato-lover’s fest. It’s dressed with a piquant, sundried-tomato-enhanced vinaigrette for a double tomato whammy.

For those of you with way too many tomatoes, try my recipe for Toss in the Pot Tomato Sauce that is easily frozen.

Here’s a few recent fun tomato posts from my Twitter Friends:

Melissa from @Dinette66 is doing: Sharlyn melon w/ serrano, Halibut w/ curried corn chowder & tomato jam, ricotta gnocchi w/ spicy chic sausage, basil, sweet 100’s!

@qafarmersmarket Love the gazpachos (galzpachos!) by @chefreinvented and @ChefRobinL www.qafma.org/recipes

@lornalee how fun! I’ve been slicing, sprinkle of Secret Stash chorizo salt, pepper, good olive oil. Simpler the better w/ heirlooms!

If you would like to share your tomato comments too, tweet to me at @kathycaseychef

Here’s to lots more tomatoes while the season’s ripe! ©2009 by Kathy Casey

Super Summer Tomato Salad with Heirloom Tomatoes, Blue Cheese and Sundried Tomato Herb Vinaigrette

Serves 4 — Makes 1 cup vinaigrette

4 medium or 2 very large heirloom tomatoes, preferably Green Zebra, Mr. Stripy or Tigerella, about 1 1/2 pounds total

1 1/2 cups gourmet greens

1/4 cup crumbled blue cheese

1/2 cup assorted red or yellow currant or tiny teardrop tomatoes, cut in half or kept whole if very tiny

Vinaigrette

2 Tbsp finely chopped sundried tomatoes packed in oil

1 1/2 tsp finely minced garlic

1/2 tsp sugar

1/2 tsp salt

3 Tbsp red wine vinegar

1/2 cup extra-virgin olive oil

1 Tbsp chopped fresh basil

1 Tbsp thinly sliced fresh chives

1 tsp minced fresh thyme

To make the vinaigrette: In a small bowl mix together the sundried tomatoes, garlic, sugar, salt and red wine vinegar. Then gradually whisk in the olive oil. Stir in herbs and refrigerate until needed.

To assemble the salad: Cut the tomatoes into nice fat slices, about 1/3 inch thick. Divide between 4 large salad or dinner plates. Drizzle each salad with 2 tablespoons of the vinaigrette. (Be sure to whisk together well before each use.) Then scatter gourmet greens across the tomatoes. Next, scatter the blue cheese over the salads and then the tiny tomatoes. Drizzle each salad with about 1 tablespoon more of the dressing and pass any extra if desired. Serve immediately.

Extra dressing can be kept refrigerated for up to 2 weeks. Recipe © 2009 by Kathy Casey.

Toss in the Pot Tomato Sauce

Makes 7 cups

2 Tbsp extra-virgin olive oil

12 cloves garlic

2 small onions, chopped

2 red bell peppers, cored and cut up in large pieces (optional)

1/4 tsp red chili flakes (use less if you like less spice)

1/2 cup red wine

4 lb fresh tomatoes, cored and cut in half

1/2 cup fresh basil leaves

2 – 4 Tbsp extra-virgin olive oil (optional)

2 tsp kosher salt (adjust seasoning more or less as desired)

In a large heavy pot or Dutch oven, heat 2 tablespoons olive oil over medium heat and add garlic, onions, bell pepper and chili flakes. Slowly sauté for about 5 minutes, add the wine and let cook about one-half minute more, then add the tomatoes and basil leaves. Bring to a slow simmer and cook for about 1 – 1 1/2 hours while you go about your business. Every once in awhile, go by and stir it. (If making a doubled batch, you may need to simmer the sauce an extra 20 to 30 minutes or so.)

Once sauce is nicely reduced, then set it off the stove to cool. When reasonably cool, puree in batches in blender. If desired, blend in the final olive oil after sauce is totally pureed. Season with salt, adding more or less to taste. If freezing sauce, place in freezer containers, label, date and freeze until needed.

Chef’s notes and other options: Sauté some chopped mushrooms with the onions, or try adding other fresh herbs such as a little fresh thyme leaves, oregano and marjoram for an herby sauce. For a Southwest flavor, add a little jalapeño and some coriander and cumin seeds in the sautéing process. Or just use your imagination and create your own signature base sauce. Recipe © 2009 by Kathy Casey.

Posted by Kathy on August 27th, 2009  |  Comments Off on Tomatoes |  Posted in Dishing with Kathy Casey Blog, KOMO Radio, other, Pasta-Risotto, Recent Posts, Recipes, salads

Preserving the Flavor

Jam 004

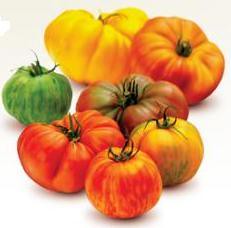
When produce is at its peak in the summer, why not preserve the flavor and stretch out the time a little on the season’s goodness? But what do you do with those abundant fruits and vegetables?

A lot of people love homemade put-up goods but are too intimidated by the procedure to can them by the traditional water-bath method. I, too, love to stock up goodies, but like many of you I’m too crunched on time.

Though I love to can jams, preserves and chutneys, a lot of time I will make things that I can dry, freeze or refrigerate. Refrigerated items may not last as long as something processed but you can still enjoy the fruits of your labor for at least a couple of months past the season. At work we do mass-production jamming—making a few hundred jars in a day—but at home often it’s just easier for preserves, jams, purees and fruit syrups to be frozen and pickled goods refrigerated.

I also love to dry things. Years ago, I started playing around with flavored sugars, such as the recipe for Fragrant Rose Sugar. I’ve always had old rose varieties in our yard, which we never spray. No, they aren’t the most perfect roses—but do they ever smell beautiful, rich, sweet and perfumey… and TASTE luscious! So I tried drying the petals in sugar then blending the mixture to an aromatic powdered sugar. Wow! It worked like a charm and the sugar tastes heavenly sprinkled on fresh berries or, in the winter when you need a bit of summer, put in sugar cookies that call for powdered sugar. I also love to make fragrant sugar with lavender, lemon verbena and rosemary (All pretty tasty in cocktails or to rim glasses with!).

You can also use this method with fresh herbs and salt. Try making a basil and thyme salt, or how about one with thinly sliced, tiny fresh hot peppers and a bit of oregano for a spicy Mexican version.

And the best part is … flavored sugars and salts don’t even heat up the kitchen!

Fruit vinegars are also super-easy to make, and they last for a LONG time. The Berry Delicious Vinegar—sweet ripe berries infused in white wine vinegar—makes the most beautiful vinaigrette. Just whisk together 1 part vinegar to 3 parts light olive oil, add a little finely chopped shallot and some salt and pepper, and there you have it—the perfect foil for tender garden greens.

My recipe for quick and easy, slightly hot, Sweet, Sour & Spicy Melon Balls—with their hint of mint and basil—pairs with some thinly sliced prosciutto and a great loaf of bread. Presto! A nice light supper or d’lish appetizer for a hot day.

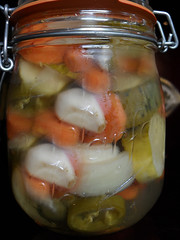
And who doesn’t love homemade pickles? My recipe for Quick Summer Garden Pickles is fast and easy. Clean, quart jars are packed with a mixture of vegetables, then a brine is boiled and quickly poured into the veggie-packed jars. Just quickly screw on the lid, let sit until cooled to room temperature then refrigerate. In just two days you have delicious pickles to bring to a picnic or enjoy at a backyard BBQ. The only tears you will shed when making these are the ones that may form if you get too big a whiff of the boiling vinegar brine. Be forewarned: the pungent, wafting aroma may cause the neighbors to come begging for some of your pickles.

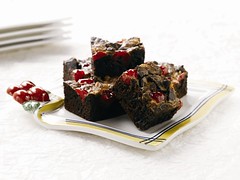
And, no, I didn’t forget about jam. I’ll be writing a whole story on that, but I did whip up a recipe for no-peel Spiced Nectarine Jam. Made with a bit of brown sugar, cinnamon and allspice, this is great on morning toast or bagels. You can even toss it with a few fresh, sliced peaches, nectarines or cherries, add a dash of dark rum and serve over vanilla ice cream for a quickie dessert.

So try to take a little time to preserve the flavors of summer. It’s not that hard … you’ll be glad you did when the skies turn gray.

© Kathy Casey – blogging at Dishing with Kathy Casey

Follow me on Twitter @kathycaseychef

For a great book to help you get started, check out Canning & Preserving Your Own Harvest: An Encyclopedia of Country Living Guide by Carla Emery & Lorene Edwards Forkner, Sasquatch Books.

pickles

QUICK SUMMER GARDEN PICKLES

Makes 4 quarts

These quick and easy refrigerator pickles are a great way to use up your garden’s bounty. Cauliflower is also a tasty addition.

Vegetable Mixture:

7 cups (about 2 lb.) 3/4″-sliced pickling cucumbers

2 1/2 cups (3/4 lb.) 1/2″-thick-slant-cut carrots

2 medium jalapeño peppers, sliced in rings

1 1/2 cups (6 oz. wt.) 1 1/2″ chunks yellow or white onion

1 1/2 cups (6 oz. wt.) 1 1/2″ chunks red onion

2 cups (8 oz. wt.) 1″ chunks red bell peppers (substitute some hot peppers or some of your other favorite peppers if desired)

2 cups (3/4 lb.) 1/2″- to 3/4″-sliced yellow zucchini or yellow squash

Pickling Brine:

2 cups white distilled vinegar

2 cups cider vinegar

1 3/4 cups water

1 3/4 cups sugar

2 tablespoons pickling spice

3 tablespoons kosher salt

1/4 teaspoon crushed red pepper flakes

Place all vegetables in a large bowl and toss together to mix colors. Divide vegetables among four clean, regular-mouth, 1-quart canning jars, packing vegetables in tight. Set jars on a dish towel in a draft-free place in the kitchen.

Place the pickling brine ingredients in a non-aluminum saucepan over high heat. Bring to a rolling boil and then immediately ladle pickling brine into filled jars, filling to 1/2″ from the top. Be sure to cover the vegetables with liquid and distribute spices evenly. Using a nonmetallic tool, such as a wooden chopstick, quickly but carefully release air bubbles, then add more brine if needed. Wipe the jar rim with a clean, damp cloth. Immediately cover jar with lid and tighten. Let cool to room temperature, about 1 – 2 hours, then refrigerate. Let pickle for at least 2 days before eating. Pickles will last for up to 2 months, refrigerated. © Kathy Casey – blogging at Dishing with Kathy Casey


SWEET, SOUR & SPICY MELON BALLS

Makes 3 pints

These are great with prosciutto, pates or grilled meats or poultry. Also excellent as an accompaniment to spicy Indian food or vegetarian curry dishes.

3 cups cantaloupe balls or other orange-fleshed melons (see Chef’s Notes)

3 cups honeydew melon balls

3 large sprigs fresh basil

2 tablespoons chopped fresh mint

3/4 teaspoon red chili flakes

1 1/2 cups water

2 cups sugar

3/4 cup white wine vinegar

1 tablespoon kosher salt

Toss melon balls together. Fill three 1-pint, wide-mouth jars with the melon balls, tucking a basil sprig into each jar.

In a non-aluminum saucepan, combine all the remaining ingredients. Bring to a boil over high heat and boil for 2 minutes, then remove from the heat and let cool to room temperature.

When mixture is cool, evenly pour over the jars of melon balls, filling to top and being sure to cover the fruit completely. Using a nonmetallic tool, such as a wooden chopstick, carefully release air bubbles, then add more liquid if needed. Wipe the jar rim with a clean, damp cloth. Cover with lids and refrigerate for at least 24 hours before eating. The melon balls will keep for about 2 – 3 weeks, refrigerated.

Chef’s Notes: Use ripe but firm melons. To make melon balls: Cut melon in half and scoop out seeds. With a melon-ball gadget, scoop out balls. (I use a large-size baller.) © Kathy Casey – blogging at Dishing with Kathy Casey


BERRY DELICIOUS VINEGAR

Makes about 3 cups

Vinegar will keep about 1 year at room temperature, or you can store it refrigerated if you want the color to stay red longer. If stored at room temperature, the red color will “brown out” a bit—but the flavor will still be d’lish. You can also use other seasonal fruits with this recipe and/or add herbs or spices. The sugar and salt can be omitted for just a straight fruit vinegar. Some flavor combinations that I have enjoyed are peach-tarragon, cherry-star anise (you don’t need to pit the cherries, just squish them) and pear-cardamom.

1 1/2 cups marionberries, blackberries or raspberries (or use a combination of any fresh berries)

3 cups white wine vinegar or white distilled vinegar

6 tablespoons sugar

1 1/2 teaspoons kosher salt

Place berries in a stainless steel bowl or pot or a glass cooking pot. Give them a little mash to break them up slightly with a potato masher. (Or you can make the recipe in large glass canning jars that will take the heat.)

In a stainless steel saucepan, heat vinegar, sugar and salt until just boiling. Remove from heat and pour over berries.

Let cool. Cover and allow to stand for at least 48 hours unrefrigerated or up to 7 days in refrigerator. Then strain through a cheesecloth or coffee filter-lined strainer. (If straining through coffee filters, strain first through a mesh strainer then through the coffee filter-lined strainer.) With a ladle or wooden spoon, lightly push through any extra juice. Discard the solids. Bring strained vinegar to a boil again and then fill clean wine bottles or decorative bottles with HOT vinegar. Cap and cool.

Chef’s Notes: This recipe can be multiplied several times. © Kathy Casey – blogging at Dishing with Kathy Casey


FRAGRANT ROSE SUGAR

Makes 1 1/2 cups

1 cup tightly packed UNSPRAYED fragrant rose petals

1 1/2 cups sugar

A few drops rose water (optional)

In a large glass baking pan (13”x9”) or large bowl, mix together the sugar and rose petals. Cover bowl half-way with plastic wrap. Let sit in a dry place for 2 days, stirring every day. Then toss, remove plastic, cover with paper towels, and let sit for about 4 – 5 more days or until petals and sugar are dry, stirring every day or so. If sugar has stuck to bottom of bowl, gently tap bowl on counter to loosen.

In a blender or very clean-of-smells coffee grinder or food processor, process petals and sugar in small batches till sugar is powdered and no bits or lumps remain. (If using a blender, process the sugar in about 3 batches. If sugar has a hard time getting going in blender, shake blender cup with lid on and blend on high. You may need to shake it a couple of times before it gets going.)

Place sugar in a glass jar with a tight-fitting lid and keep in a cool dry place for up to a year. This is a lovely gift to package in smaller jars with beautiful handmade labels.

Chef’s Notes: This sugar is delicious sprinkled on fresh berries, or used in shortbread cookies that call for powdered sugar. It is also terrific in homemade lemonade. Be sure to use unsprayed rose petals. © Kathy Casey – blogging at Dishing with Kathy Casey

ROSEMARY SUGAR

Makes 1 cup

2 – 3 tablespoons fresh rosemary leaves, coarsely chopped

1 cup superfine or baker’s sugar

Mix the rosemary and sugar together, and spread the mixture on a rimmed baking sheet. Set in a warm dry place for about 4 days, until the rosemary is completely dried. Process in a food processor or spice grinder until finely ground. Store in a tightly sealed container for up to 3 months at room temperature. © Kathy Casey – blogging at Dishing with Kathy Casey


RIBBONS OF ROASTED PEPPERS IN HERB OIL

Makes 5 half-pint jars

When ready to serve, just mix in chopped, pitted kalamata olives and top with shavings of fresh Parmesan cheese. Serve with crusty, rustic Italian bread. The peppers are also delicious tossed with pasta.

3 lb. assorted, colorful sweet and hot peppers

1 1/2 cups olive oil

6 tablespoons balsamic, red wine or sherry vinegar

1 1/2 teaspoons salt

3 tablespoons minced, mixed fresh herbs, such as basil, thyme, oregano, marjoram

3 tablespoons minced fresh parsley

Roast peppers over a hot grill or coals, over a gas flame, under a broiler, or in a 500-degree oven, turning often until skin is totally blistered and charred black. Immediately place in a bowl and cover with plastic wrap to steam skins loose. Let cool until peppers can be handled, about 15 – 20 minutes. Slip skin off, seed and slice peppers into long, 1/4”-wide strips.

Meanwhile, whisk together the remaining ingredients in a large bowl. Toss in peppers, coating well. Divide peppers evenly into 5 half-pint jars or plastic freezer containers, topping each one with the extra herb oil. Label and freeze for up to 1 year or store refrigerated for up to 2 weeks. © Kathy Casey – blogging at Dishing with Kathy Casey


SPICED NECTARINE JAM

Makes 6 1/2 – 7 half-pint jars

Select ripe, juicy nectarines for this recipe. For variety, you can also add other interesting things to this jam, such as 1 teaspoon rose water and a big pinch of ground cardamom for a more “exotic” preserve.

5 cups sugar

1/2 cup packed, light brown sugar

1/2 teaspoon ground cinnamon

1/4 teaspoon ground allspice

6 cups chopped, skin-on, ripe nectarines (Purchase about 3 lb.)

1/2 cup fresh lemon juice

1 box MCP pectin

1/2 teaspoon butter

Sterilize 7 half-pint jars and keep them in hot water until ready to drain and fill. Prepare lids and rings according to manufacturer’s instructions. Place a dish towel in a non-drafty area.

Measure out sugars and spices and mix together in a large bowl.

In a 6- to 8-quart heavy-bottomed, stainless steel or enameled pot, combine fruit, lemon juice, pectin and butter. Stir thoroughly. Place over medium-high to high heat and bring to a full rolling boil, stirring constantly to prevent scorching.

When at a rolling boil, add sugar mixture and stir in well. Stirring constantly, return mixture to a full rolling boil and boil 6 minutes while continuing to stir. Reduce heat if necessary but be sure to maintain a full rolling boil.

Remove from heat and quickly ladle boiling jam into drained jars allowing for 1/4” headspace. Wipe top edges and threads of jars with clean, damp cloth. Follow water-bath canning instructions (load jars into a jar rack using the handles and be sure water comes up over the tops of jars at least by 1 inch. Water must be rapidly boiling. Start the timer when water returns to a full rolling boil – cover with lid and process for 10 minutes.

Remove from heat and cool on towels. Check to see that all lids are sealed – and refrigerate any that are not.

© Kathy Casey – blogging at Dishing with Kathy Casey

Posted by Kathy on August 20th, 2009  |  Comments Off on Preserving the Flavor |  Posted in Books to Cook, Dishing with Kathy Casey Blog, KOMO Radio, other, Recent Posts, Recipes

Refreshing Summer Melons

With their crisp, cool and refreshing qualities, melons evoke the essence of summer pleasure. We enjoy them in a multitude of ways, from simply chilled and eaten as hand-to-mouth wedges, to colorful melon-ball skewers for utensil-free eating at outdoor barbecues, to tequila-, vodka- or rum-injected watermelon for libationary delight.

In the past few years we have been seeing several exciting and sexy melon varieties at the markets. One kind I tried recently was a small lemony-yellow oval variety called a Korean melon (dua gan); it has a very fragrant smell and mild sweet flavor. And the French Charentais has to be one of the most aromatic and flavorful melons I have ever had.

Ripe, juicy and cold melons are of course delicious when eaten “as is”—but they perform well when starring in recipes, too. My new favorite way to enjoy melon is in Thai Chilled Melon Soup with Shrimp and fragrant herbs. Smooth and rich-tasting with the addition of coconut milk, slightly spicy and bold-spiked from Thai red curry paste, and flagrantly flavored with ginger and lemongrass, this cold soup is topped with a pouf of sweet bay shrimp and crunchy water chestnuts seasoned up with lime juice, basil and mint.

My other all-time favorite watermelon recipe is chef Todd English’s. He embellishes a melon salad with the distinctive flavors of fennel, feta and kalamata olives contrasted against the cool red-glistening fruit.

And then there’s always melon enjoyed ALMOST naked … except for a sprinkling of sea salt, my Dish D’Lish French Seasoning Salt or Dish D’Lish Cha Cha Chipotle Lime Seasoning … Yum!

Enjoy them while you can; there’s nothing like summer’s fresh melons to cool you off on a hot day. ©2009 by Kathy Casey Food Studios®

Thai Chilled Melon Soup with Shrimp

Makes about 4 cups (6 starter servings)

Soup

3 cups chopped ripe cantaloupe or other orange-fleshed melon

1 Tbsp sugar

2 tsp minced fresh ginger

1 Tbsp minced fresh lemongrass

1 tsp Thai red curry paste (we used Mae Ploy), or sub Asian chili paste

1 can (13 – 14 ounces) coconut milk (you can always sub light coconut milk)

1/2 tsp salt

2 Tbsp fresh lime juice


Topping

1/4 pound bay shrimp or chopped cooked shrimp (about 3/4 cup)

1/4 cup tiny-diced water chestnuts (Fresh ones are great if you can find them!)

1 Tbsp finely chopped fresh mint

2 Tbsp finely chopped fresh cilantro

1 Tbsp fresh lime juice

Garnish: fresh cilantro sprigs and lime wedges

In a food processor or blender, process the cantaloupe, sugar, ginger, lemongrass and curry paste until evenly pureed. Mix in the coconut milk, salt and lime juice.

In a small bowl, mix the topping ingredients together. Ladle soup into small bowls and spoon a pouf of topping into each serving. Garnish with cilantro sprigs. Pass lime wedges on the side. ©2009 by Kathy Casey Food Studios®


Todd English’s Watermelon, Fennel and Black Olive Salad with Feta Cheese

Makes 8 servings

4 cups seeded watermelon chunks

1 large fennel bulb, thinly sliced on a Japanese mandoline (about 2 cups)

1/2 cup coarsely chopped pitted kalamata olives

1 large red onion, thinly sliced (about 2 cups)

1 bunch green onions, green part only, chopped

1/4 cup chopped fresh basil leaves

1 1/2 cups crumbled feta cheese

1/4 cup fresh lemon juice

1/2 cup extra-virgin olive oil

2 Tbsp balsamic vinegar

1 tsp kosher salt

1/2 tsp black pepper


Put the watermelon, fennel, olives, red onion, green onion, basil leaves, and feta in a large bowl. Add the remaining ingredients and toss well. Divide among salad plates and serve immediately. Adapted from Star Palate: Celebrity Cookbook for a Cure, by Tami Agassi and Kathy Casey.

Posted by Kathy on August 13th, 2009  |  Comments Off on Refreshing Summer Melons |  Posted in Dishing with Kathy Casey Blog, KOMO Radio, Recent Posts, Recipes, salads, soups
Untitled