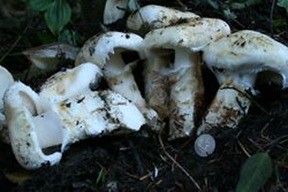
Why do I wish for rain every fall? Because as soon as it begins, our Northwest grounds moisten and the magic begins. Local wild mushrooms start to pop up! Chanterelles, the fragrant matsutake, cauliflower mushroom (its genus name is Sparassis but it does look like a big cauliflower), angel wings, hedgehog, oyster … the Pacific Northwest has a bounty of edibles yours for the finding. Wild mushroom foraging is one of my favorite activities during the fall season.
Tasty matsutake mushrooms – nom nom nom!
I have been a huge foraging enthusiast for years. It’s how I met fellow mycophagist (mushroom eater/lover) Patrice Benson, who let me tag along through the years to her secret mushroom-picking spots. Of course, I never know exactly where we are going because, like any good mushroom hunter, Patrice would never tell me exactly where we were. Lucky for her, I’m so directionally challenged that I wouldn’t be able to find my way back if I tried!
For over 20 years, Patrice shared her amazing mushroom knowledge with local enthusiasts and chefs, teaching everyone the ins and outs of seeking wild mushrooms. Patrice passed on recently but I know she will be with us in spirit this year as we seek out the first of the season’s mushrooms.

Dear friend Patrice Benson with a bounty of mushrooms! Look at all those Chanterelles!
Thank you, Patrice, for sharing your wonderful knowledge with me and so many others.
If you’re curious about foraging but have never been before, I highly recommend checking out the Puget Sound Mycological Society. They have scores of info for wild mushroom lovers of all backgrounds. From budding beginners to seasoned professionals, the PSMS has all sorts of activities and programs to keep you hunting!
Speaking of activities, this weekend is the annual Puget Sound Wild Mushroom Show held at the Mountaineers Club (located in Seattle’s Magnusson Park), where there will be hundreds of species exhibited. The PSMS has put on a wild mushroom festival every year since 1964. Their two-day fair is one of the largest in North America.
There’ll be guest speakers, program/membership info, an art contest and of course cooking demos! I’ll be cooking up some wild mushroom fun on Sunday (Oct.14) from 2-4 pm — and sharing my “When I Found the Mother Load” story. General Admission is $10 and fun for all ages!
Don’t fret if you can’t make out to the show! There is another great opportunity for wild mushroom foragers – the 27th Annual Breitenbush Mushroom Gathering! Held at the Breitenbush Hot Springs on October 18th – 21st, attendees will focus on the diversity of the wild mushrooms in the Pacific Northwest and the many functions that mushrooms have for both humans and the natural world.
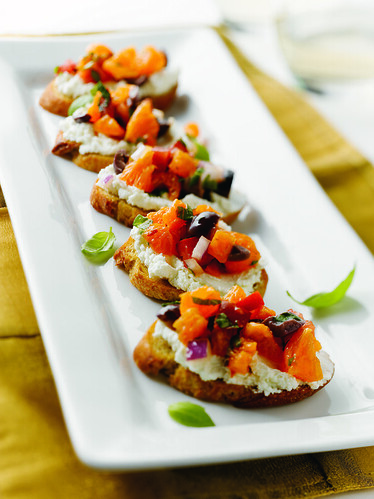
Whether it’s in the woods or from your favorite farmers market, use up this season’s chanterelles in my Savory Chanterelle Bread Pudding one of my favorite wild mushroom recipes.
If you do get a chance to go mushroom hunting, pack up some extra ingredients (as well as rustic breads and a bottle of wine!), a cast iron skillet, a few other staple ingredients and a portable burner – then try making my Wild Mushroom Ragout after pulling in your day’s bounty of mushrooms. So yummy slathered over thick slices of rustic bread and a glass of vino after an exhilarating day roaming the woods for the big find.
So to all you mycophagists out there, here’s to a fun and fruitful season of wild mushroom foraging! -Kathy
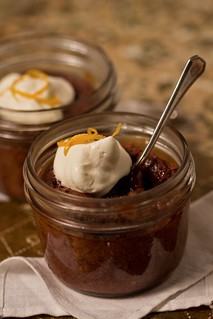
Savory Chanterelle Bread Pudding
It is important to use a rustic-style bread for this recipe—not airy bread.
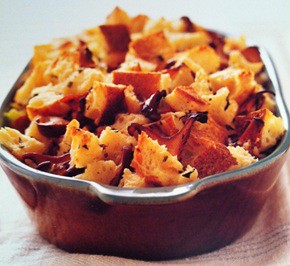
(Photo from Kathy Casey’s Northwest Table, Chronicle Books)
Makes 6 to 8 servings
1 Tbsp olive oil or butter
2 cups cleaned and sliced chanterelles (about 10 ounces)
1/2 cup diced onion
1/3 cup diced celery
1 Tbsp minced fresh garlic
4 cups 1-inch-cubed firm, rustic French- or Italian-style bread
1 1/2 Tbsps minced fresh sage
1 Tbsp minced fresh thyme or lemon thyme
1 1/2 tsp salt
1/4 tsp black pepper
1 1/2 cups half-and-half
1 1/2 cups milk
2 eggs
2 egg yolks
Preheat an oven to 325°F. Heat the oil in a large sauté pan or skillet over medium-high heat. Sauté the chanterelles and onion for 3 to 4 minutes, or until three-quarters done. Add the celery and sauté for about 1 1/2 to 2 minutes more. Add the garlic and sauté for 30 seconds more, taking care not to burn the garlic. Remove from the heat.
Combine the bread cubes, herbs, salt, and pepper in a large bowl. Mix in the cooked mushroom mixture and set aside.
Butter a 6-cup glass or ceramic baking dish or spray with vegetable-oil cooking spray.
Whisk the half-and-half, milk, eggs, and egg yolks in a medium bowl. Pour the egg mixture into the bread mixture and mix gently and thoroughly. Transfer the mixture to the baking dish and level out the surface, lightly pressing the bread down into the dish.
Bake for 50 to 60 minutes, or until the custard is just set in the center. Do not overbake or the custard will scramble.
Recipe from Kathy Casey’s Northwest Table, Chronicle Books
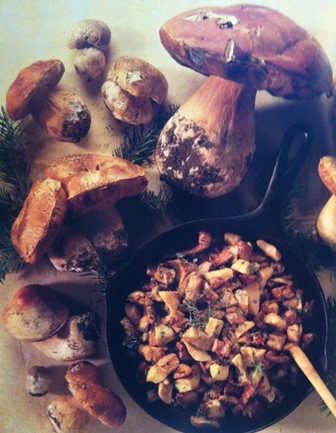
My Wild Mushroom Ragout – that’s a 12-inch cast iron skillet…making that Boletus huge!
This is from my first book Pacific Northwest the Beautiful in 1993. Patrice picked these mushrooms for the photo shoot!
Wild Mushroom Ragout
From my first cook book – this recipe is still one of my favorites to enjoy after a long day of foraging. For a very rich flavor soak a few dried wild mushrooms such as Morels or Boletous (Cepes) in the brandy or sherry, then add to simmering ragout. Serve ragout in a big cast iron skillet and spread it on toasted rustic bread, or serve it over grilled fish or roasted chicken or pork.
For making out on your foraging trip take some butter or olive oil, some fresh herbs, onion, garlic, a half pint of heavy cream and a little jar of sherry brandy and white wine mixed together, a lemon and some seasoning — delete the stock. Pack a portable burner, cast iron skillet, a spoon, small cutting board, knife and a loaf of rustic bread. And wish for lot’s of mushrooms.
Makes about 6 servings
4 Tbsps butter
1 cup thinly sliced white onion
2 pounds mushrooms, quartered or sliced (a mixture of local fresh wild mushrooms, if available)
1 Tbsp fresh garlic, minced
2 tsp fresh thyme
1 1/2 tsp minced fresh rosemary or fresh mixed herbs such as thyme, chives and basil
1/4 cup chicken, or mushroom stock, (more or less as needed)
3 Tbsps sherry
2 Tbsps brandy (optional)
1 cup heavy cream
2-3 tsp lemon juice
1/2 tsp salt
1/8 tsp fresh ground black pepper
2 Tbsps chopped fresh parsley (optional)
In a large heavy bottomed skillet or small brazing pan. Melt butter over moderately high heat, add onions, mushrooms and garlic. Cook mixture, stirring often till mushrooms and onions are softened about 3-4 minutes. Add herbs, stock, sherry and brandy. Reduce till only a little liquid remains about 5 minutes or more depending upon if your mushrooms have a lot of moisture in them.
Add whipping cream and cook till mixture is a nice lightly thickened about 3-5 minutes. Add lemon juice. Cook for a couple more minutes. Season and stir in parsley.
Recipe © Kathy Casey Food Studios