seafood

Easy Entertaining – How To Cook A Perfect Side Of Salmon

I’m a true Northwestern-er and my love for delicious fresh salmon is definitely in my blood. Grilled, poached, baked or raw – any way you serve it is always a treat!

That being said, I have a new favorite salmon preparation: Citrus Marinated Slow-Cooked Salmon. Perfect to serve to a crowd, quick to prepare, and oh-so delicious!

Smear a side of salmon with a flavorful mixture of mustard, honey, lemon zest, fresh herbs and olive oil. Then lay out super thin slices of lemon and oranges – alternating between orange and lemon slices for a truly beautiful presentation. (I also like to slip in a bit of shaved fennel for a tasty twist too!).

The fish is baked at 250 degrees for about 40 minutes, depending on how thick your fillet is. This low-and-slow method makes for a very moist and succulent preparation and great center-piece dish for your next get-together. –Kathy

Citrus Salmon
Photo by Kathy Casey Food Studios®.

Sunkist® Citrus Marinated Slow-Cooked Salmon
This salmon preparation is perfect to serve to a crowd. Slices of citrus baked over the top, and the low-and-slow cooking method keep it moist.

Makes about 6 servings

Salmon
1 small side of salmon with skin, (about 2 – 2 1/2 pounds)
1 Sunkist® navel orange
1 Sunkist lemon

Marinade
3 Tbsp. extra-virgin olive oil
1 Tbsp. Dijon mustard
1 Tbsp. local honey
zest of 1 Sunkist Lemon*
2 Tbsp. chopped minced fresh dill
2 Tbsp. chopped fresh parsley
2 Tbsp. thinly sliced fresh chives
1 1/2 tsp. kosher salt
1/2 tsp. fresh-ground black pepper

Preheat oven to 250 degrees F°.

Bring fish out of refrigerator 20 minutes before cooking. Cut 2 pieces of heavy-duty wide foil to fit a baking sheet pan. Stack the pieces shiny side down. Spray generously with cooking spray.

Pat fish dry with paper towels. Place the salmon skin side down in the middle of the foil. If the salmon is to long for your baking sheet or if the tail end is thin, tuck the tail under.

Slice the orange and lemon each into 8 thin slices. Set aside.

In a small bowl, mix together marinade ingredients. Spoon the marinade over the salmon, coating well.

Lay the sliced citrus over the top of the salmon arranging in a “scale-like” pattern. Cook salmon for approximately 40 – 45 minutes, depending upon desired doneness and the thickness of your salmon.

* To make lemon zest: Zest is the outer peel of the fruit with no white pith attached. You can make fine zest with a zesting tool, microplainer or fine grater.

Recipe by Kathy Casey Food Studios for Sunkist®.

Posted by Kathy Casey on June 26th, 2014  |  Comments Off on Easy Entertaining – How To Cook A Perfect Side Of Salmon |  Posted in Dishing with Kathy Casey Blog, KOMO Radio, Recent Posts, Recipes, seafood

Marinades

Summer means grilling and nothing boosts the flavor goodness on grilled meat, seafood and veggies like a fantastic marinade. They are simple to make and give an easy flavor jolt to your dinner dishes with only a few ingredients.

Marinade
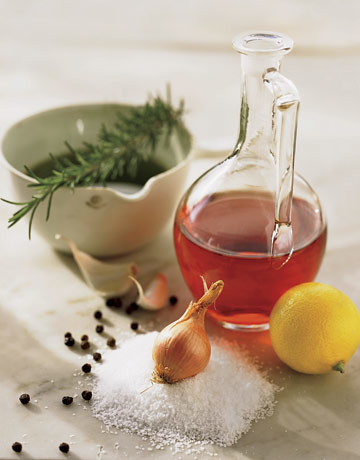
(Photo courtesy of Country Living)

Take inspiration for your marinade from different cultures. Chipotle, lime, and agave add instant cha-cha-cha to your chicken. Or try ginger, thai basil, sesame oil, and hot chili paste for a bit of zen for your dish.

My biggest marinade tip is: Make it strong! The bolder the flavor; the bigger the taste. If you make your marinade and it tastes good – then it’s not bold enough. Pump up the flavor even more with spices, garlic, herbs, etc. Get creative!

Citrus juices are common in marinades and add a big hit of brightness to smoky grilled flavors. Keep in mind that marinating with citrus juices for too long can begin to “cook” your protein, particularly fish, before it even hits the heat. I like to use orange juice concentrate to really get a citrus punch in my marinade.

Another quick tip: If your marinade contains sugar or honey, be sure to grill on medium-low heat to prevent burning. Honey or sugar can scorch on high heat.

I’ve included a great chart for making marinades with a basic recipe and then add-ins for you to customize. I also put together some marinating and grilling tips for your next patio party to be grilling-successful!

So this summer, jazz up your cooking with some mouth-watering marinades. –Kathy

Basic Marinade for Grilling
Marinates 4 to 6 portions of protein

2 tablespoons fresh lemon juice
1 tablespoon minced fresh rosemary or other fresh herb
1 tablespoon Dijon mustard
1 tablespoon finely minced garlic
1/3 cup olive oil or salad oil, depending upon which herbs you are using
1/2 teaspoon coarse-ground black pepper or 1/4 teaspoon red chili flakes
4 to 6 portions of protein, such as chicken breasts, steaks, pork loin chops, salmon, or large shrimp, or large portobello mushrooms for a vegetarian option

In a small bowl, whisk together all marinade ingredients.

Lay out protein in a shallow, non-aluminum baking pan. Spoon half the marinade on the top side of each portion and rub it around, then flip the protein and spoon on the remaining marinade, being sure that all surfaces are covered.

Cover pan with plastic wrap and refrigerate for at least 30 minutes or up to overnight.

When ready to cook, heat grill to medium-high heat, then brush grill lightly with oil. Be sure grill is hot before placing protein on it. Sprinkle both sides of protein with kosher salt, and grill on the first side, being sure not to move it until there is a good charred grill mark. (The biggest mistake that home cooks make is to “touch” what they are grilling too much and move it around before it is ready; this causes sticking.)

Grill to desired doneness. No specific time can be given as it will depend upon your heat and what you are grilling. Typically, if there are nice grill marks on each side, the food is probably close to done. You can refer to internal cooking temperatures on the Internet, but I think that most government-determined temperatures are too high. So, until you are a seasoned griller, get a small paring knife and cut a tiny “peek “into the center of what you are cooking. For poultry you will want to see no pink; fish should be just cooked and not dry; shrimp should be just pink on the outside and barely opaque inside; and steaks should be the way you like them!

This marinade is a basic one, so get creative here, too, when you feel ready. Practice makes perfect. And grilling is “rustic,” so if you make a mistake, it is not the end of the world—just jump back in and try it again soon.

Recipe by Kathy Casey Food Studios®

Marinade Customization Chart

Acid 1/4 cup Any of the following or a combination equaling 1/4 cup:

lemon juice

lime juice

cider vinegar

balsamic vinegar

red wine vinegar

white wine vinegar

rice wine vinegar

Dijon mustard 2 teaspoons
Kosher salt 3/4 teaspoon (use less if adding cheese or olives)
Oil 3/4 cup Any of the following or a combination equaling 3/4 cup:

mild-tasting vegetable oil, such as canola

olive oil, extra-virgin olive oil

nut oils, such as hazelnut or walnut oil (do not use nut oils for more than half of total oil)

Flavorings as desired black pepper, pinch of cayenne pepper

1 tablespoon grated lemon, lime or orange zest (colored part only—no white pith)

1 tablespoon chopped mild fresh herbs (basil, tarragon, chives, oregano, cilantro)

1 1/2 teaspoons chopped strong fresh herbs (thyme, rosemary, marjoram)

2 tablespoons chopped calamata olives, sun dried tomatoes or roasted peppers

2 to 3 teaspoons finely minced fresh garlic

2 to 3 teaspoons finely minced fresh ginger

1 tablespoon honey

2 teaspoons sugar

2 teaspoons poppy seeds

1 tablespoon Asian-style sesame oil

1 tablespoon toasted sesame seeds

1 tablespoon finely minced shallots

2 tablespoons thinly sliced green onions

1 teaspoon hot chili paste or hot sauce

In a small mixing bowl, use a small wire whisk and combine together your acid component, Dijon mustard and salt. Then slowly whisk in the oil, adding it in a thin drizzle. This technique is to emulsify (make smooth and combined) your marinade. Then add your flavoring components.

You can keep the unused marinade refrigerated for up to 2 weeks. Experiment with different flavorings and combinations. Discard after using the marinade.

Marinating tips:

  • The item you are marinating doesn’t have to be swimming in liquid if the marinade is made strong enough.
  • Freeze extra marinade in zip-lock freezer bags. When ready to use, just pull it out of the freezer, defrost and add in your item to be marinated.
  • Marinades with a lot of acid (vinegar, wine, citrus) should be used for a shorter time on proteins.
  • Make marinades thick with herbs and citrus zests — almost like a wet rub — for a big flavor punch. Smear on 1 tablespoon per portion.
  • Try smearing thicker marinades under the skin of whole chickens, then let them sit overnight, refrigerated, before roasting.
  • Created by Kathy Casey Food Studios®

    Lemon & Caper Marinade for Seafood or Chicken
    Makes about 1/3 cup

    2 teaspoons finely minced fresh lemon zest
    1 tablespoon finely minced fresh basil
    2 teaspoons finely minced fresh thyme
    1 tablespoon thinly sliced fresh chives
    2 tablespoons capers, finely chopped
    1 tablespoon fresh lemon juice
    1/4 cup extra virgin olive oil

    Whisk all ingredients together well.

    Keep refrigerated for up to 2 days.

    Marinate fish, shrimp, scallops or chicken breasts for at least 4 hours or up to 8 hours.

    Recipe by Kathy Casey Food Studios®

    Cider Marinade for Chicken or Pork
    Makes 1 cup

    1/4 teaspoon crushed red chili flakes
    1 teaspoon rubbed dry sage or 1 Tbsp. fresh sage finely minced
    1 teaspoon dry thyme leaves or 1 Tbsp. fresh thyme finely minced
    3/4 teaspoon celery seed
    1 tablespoon sugar
    2 teaspoons finely minced lemon zest
    1/2 cup apple cider
    4 teaspoons cider vinegar
    2 tablespoons Dijon mustard
    1/4 cup salad oil

    Whisk all ingredients together well. Keep refrigerated for up to 1 week.

    Marinate chicken breasts or pork chops for at least 4 hours or up to 8 hours before cooking.

    Recipe by Kathy Casey Food Studios®


    Citrus Mojo Chili Marinade for Poultry, Pork or Seafood

    Makes 3/4 cup

    2 teaspoons finely minced orange zest
    1 orange
    1 tablespoon fresh lime juice
    1/4 cup olive oil
    1/4 teaspoon salt
    1/4 teaspoon black pepper
    1 tablespoon chili powder
    2 tablespoons finely minced garlic
    2 tablespoons finely minced onion

    Zest the orange and then cut off the peel and white pith from it. Cut orange into large chunks. Place in a food processor or blender with the remaining ingredients and process until as smooth as it will get.

    Will keep refrigerated for up to 3 days.

    Marinate fish, turkey breast slices, chicken, shrimp or pork for at least 2 hours or up to overnight.

    Recipe by Kathy Casey Food Studios®

    Chermoula Marinade for Prawns, Chicken, Veggies or Steak
    Makes about 1/2 cup

    1/2 teaspoon ground cinnamon
    1 tablespoon ground cumin
    1 tablespoon ground coriander
    1 teaspoon black pepper
    1 teaspoon salt
    1/4 cup chopped cilantro
    1/4 cup chopped parsley
    1 tablespoon minced garlic
    1 teaspoon chopped fresh ginger
    2 tablespoons minced fresh lemon zest
    1 tablespoon fresh lemon juice
    1/3 cup olive oil

    Place all ingredients in a food processor or blender and process until almost smooth.

    Keep refrigerated for up to 3 days. Marinate chicken breasts, shrimp, or beef steaks for at least 4 hours or up to overnight.

    Recipe by Kathy Casey Food Studios®

    Posted by Kathy Casey on June 5th, 2014  |  Comments Off on Marinades |  Posted in Dishing with Kathy Casey Blog, KOMO Radio, meats, poultry, Recent Posts, Recipes, seafood

    Travels to India – Part 1

    Guest blogger and KCFS Intern Jenn Chong shares her recent travel stories while exploring India. Here’s Part 1 of her 3 part series.

    —————————————————–

    Hello all! I’m Jenn and I’m pleased to share some of my culinary experiences from my travels to India. The idea of Indian food probably conjures up images of super spicy food that can be too hot to handle. And while that may be true to a certain degree, India is a vast and varied country with regional cuisines appropriate for any palate.

    1

    2

    Today, I bring you to Kolkata (formerly known as Calcutta) where the food tends to be sweeter, milder in spice, and with slight tinges of sour. Located in the northeastern part of India, food from this area is often referred to as Bengali cuisine.

    Bengali cuisine is famous for its fresh fish and seafood, cooked as curries or steamed in banana leaves. Sweet flavors come from the use of unrefined cane sugar called ‘jaggery’, and the sour flavors come from heavier use of tamarind paste. My favorite dish by far was the jumbo prawn curry, which was absolutely delish (see below)!

    3
    Chingri Malai

    4

    Basanti Pulao (seasoned rice), naan, Echor-er Dalna (jackfruit curry)
    Dak Bangla Chicken Curry, Hilsa Fish Mustard Curry, Chingri Malai

    Sweets are an important part of Bengali cuisine and choices for desserts are limitless. From mishti doi (sweet yogurt) to kheer (rice pudding) to smaller confections like rasgulla, ladoo, and cham-chams, there is no such thing as a bad decision! The food in this region was so delicious it was hard to leave, but I knew there was still much more to explore and eat.

    5

    6
    Small selection of sweet treats!

    7

    Mishti doi with fresh fruit

    —————————————————–

    Stay tuned for Part 2!

    Posted by Kathy Casey on May 7th, 2014  |  Comments Off on Travels to India – Part 1 |  Posted in dessert, Dishing with Kathy Casey Blog, poultry, Recent Posts, seafood, Tasty Travels

    The Northwest eCookbooks

    Great friend, award winning writer, and long time Pacific Northwest native Cynthia Nims has written a wonderful series of e-cookbooks covering The Northwest! Whether you’re looking to cook up up Crabs and Wild Mushrooms or looking for a new combo of Soups, Salads, & Sandwiches, Cynthia has you covered and more! The ebooks are priced at $3.50 each (what a steal!) and are available to download through the Kindle and most mobile/tablet devices with the free Kindle app.

    Posted by Kathy Casey on March 12th, 2014  |  Comments Off on The Northwest eCookbooks |  Posted in appetizers, Books to Cook, breakfast, Dishing with Kathy Casey Blog, Foodie News, Lifestyle, meats, Recipes, seafood, sides

    It’s Salmon Season!

    Nothing says Pacific Northwest like salmon. It’s that time of year again when this rich, delicious local gem is readily available. Bring on the sunshine; it’s Alaska salmon-cooking season!

    Grilled Salmon
    D’lish Salmon!
    (Photo courtesy of Alaska Seafood Marketing)

    There are several varieties of salmon available locally that can fit any budget and taste, from King to Keta. Rich in slow-digesting proteins and Omega-3 fatty acids, this nutritious fish is perfect for a healthy meal whether in a salad, pan seared, or grilled.

    Salmon’s natural oil and fat content help keep it moist and tender, even when grilling. You can also help it stay that way and add some flavor with a wonderful brine before cooking it.

    Brining possibilities are endless. One of my favorites is made with brown sugar and soy. Just dunk your pieces for half an hour to an hour, then grill if the weather is warm enough or pan-sear and finish in a hot oven. Yum!

    Salmon makes the perfect platform for glazes, vinaigrettes and other tasty toppings. How about a nice coat of Chipotle Honey Glaze, a smear of Orange Ginger Butter or a drizzle of Zesty Lemon Basil Vinaigrette? This makes me want to fire up my trusty BBQ right now! See my tips below for outdoor grilling  with Alaska salmon.

    So whether you’re smoking your salmon, grilling it or oven-roasting – be sure to select wild Alaska salmon. . –Kathy

    Chipotle Honey Glaze
    Make a generous 1/2 cup

    1/2 cup local honey
    3 tablespoons puréed chipotle peppers in adobo sauce*

    Stir together in a small bowl until well combined. Store refrigerated for up to 2 weeks.

    *To make chipotle purée: Purée a can of chipotle peppers in adobo sauce with a hand blender, blender or food processor until smooth. Freeze any remaining purée for another use.

    Recipe created for Alaska Seafood Marketing by Kathy Casey Food Studios®

    Orange Ginger Butter
    Switch this basic recipe up with different combinations of citrus and herbs. Change out the ginger for garlic and try using a different mustard as well. Roll up different variations into logs in plastic wrap and freeze for up to 4 months. Just slice off a few pieces for a salmon topping anytime.

    Makes 1 cup

    8 tablespoons (1 stick) salted butter, softened, cut into chunks
    1 1/2 teaspoons Dijon mustard
    3 tablespoons orange juice concentrate
    1 tablespoon finely minced orange zest
    1 tablespoon finely minced ginger
    1/4 teaspoon salt
    2 green onions, very thinly sliced

    Place all ingredients except the green onion in a food processor. Process until smooth and emulsified, scraping down the sides of the work bowl often. (If the butter doesn’t come together right away, be patient and continue processing.) When the mixture is well blended, add the green onion and pulse until mixed. Keep refrigerated, tightly covered, for up to 7 days.

    Recipe created for Alaska Seafood Marketing by Kathy Casey Food Studios®

    Zesty Lemon Basil Vinaigrette
    This quick and easy homemade dressing is delicious drizzled over salmon. You can switch up this basic vinaigrette recipe by changing out the basil for cilantro and the lemon for lime, and/or adding a dash of hot sauce for some zing. You can also double the recipe and add all the ingredients at once to a blender to make a more creamy dressing.

    Makes 1 cup

    2 cups fresh lemon juice
    2 tablespoons local honey
    2 tablespoons Dijon mustard
    1 teaspoon finely minced fresh garlic
    1/2 cup olive oil
    2 tablespoons minced fresh basil
    1/2 teaspoon kosher salt
    Fresh-ground black pepper

    Place the lemon juice, honey, mustard and garlic in a small bowl. Whisk to combine. Continue whisking and drizzle in the oil to incorporate. Then stir in the basil, salt and pepper. Store refrigerated for up to 10 days.

    Recipe created for Alaska Seafood Marketing by Kathy Casey Food Studios®

    Outdoor Grilling – Alaska Salmon Fillet Portions
    5- to 6-ounce Alaska Keta or Sockeye salmon fillet portions, with skin
    Olive oil
    Kosher salt and pepper

    Brush grill to clean it well and lightly oil it. (See cooking tips.)

    If using a charcoal grill, load with charcoal briquettes and ignite them; heat grill to medium-high temperature, about 375° to 400°F. If using a gas or propane grill, set to medium-high temperature and heat to about 375° to 400°F.

    Bring fish out of refrigerator 15 minutes before cooking. When grill is hot, pat fish dry with paper towels.

    Drizzle a large dinner plate with olive oil. Swipe each piece of fish on both sides through oil. Sprinkle with seasoning.

    Place fish flesh side down on hottest part of grill. Let fish cook on the first side for about 3 minutes for sockeye, or 4 minutes for keta. (If the fillet is on the thinner side, reduce cooking time by about 1/2 to 1 minute on each side.) Do not move fish around as the goal is to create nice grill marks.

    Carefully flip fish over using a metal spatula. Cook on skin side for about 3 minutes for sockeye, or 4 minutes for keta, or until fish is still lightly translucent in the center. Remove fish to a plate.

    You will want to pull your fish off slightly underdone as there is heat carryover and it will continue to cook for a few minutes after removing from heat. Larger salmon species like King will take a few minutes more to cook. Use your best judgment.

    Recipe created for Alaska Seafood Marketing by Kathy Casey Food Studios®

    Posted by Kathy Casey on May 23rd, 2013  |  Comments Off on It’s Salmon Season! |  Posted in Dishing with Kathy Casey Blog, KOMO Radio, other, Recent Posts, Recipes, seafood

    Farmers Market Local Bounty

    Thanks to Washington’s amazingly diverse agricultural community, we are blessed with loads of farmers markets. Shopping for local products means you get the best of the best at the peak of its season!

    They are also a great place to pick up produce you might not have tried before like nettles (great for flavorful soup) or freshly picked wild morel mushrooms to sauté serve alongside a sizzling steak, or make a rich sauce to top halibut!

    Of course, downtown’s famous Pike Place Market is always a fun trip, but hey — new farmers markets are popping up all the time. Check out www.SeattleFarmersMarkets.org to see what’s new in the city!

    Before you venture out, here are a few helpful tips:

    -Wear comfortable shoes
    -Have a couple of large reusable grocery bags with you (for all your great finds!)
    -Bring cash (it’ll make the experience quicker and easier)
    -My biggest tip is to carry a small notebook to record cooking notes and varietal info from the growers

    So get out there and support local farmers markets! Don’t forget to leave a note on this blog with some of your favorite market finds. I would love to hear all about them! –Kathy

    Pan-Roasted Halibut with Morel Mushroom Cream
    The morel, one of the richest-tasting wild mushrooms, is a spring delight after long NW winters. Just a few morels will do you in a recipe, for their flavor is intense. Serve with sautéed fresh pea vines.

    Makes 4 servings

    Sauce
    1 tablespoon butter
    1 shallot, minced
    1 clove fresh garlic, minced
    1 cup coarse chopped fresh morel mushrooms (about 3 ounces), or 1/2 ounce dried morels, soaked in the white wine and then chopped
    3 tablespoons brandy
    1/2 cup dry white wine
    1 1/2 cups heavy whipping cream
    1 teaspoon fresh lemon juice
    1/2 teaspoon salt
    Pinch of white pepper

    Fish
    4 skinless halibut fillet portions (6 to 8 ounces each)
    Salt
    Freshly ground black pepper
    1 tablespoon olive oil

    Fresh chives for garnishing

    To make the sauce, melt the butter in a heavy saucepan over medium heat. Sauté the shallot, garlic, and mushrooms, stirring often, for about 2 minutes, or until the shallot is translucent and mushrooms are tender. Add the brandy and wine and cook to reduce for about 5 minutes. Add the cream and bring to a simmer, then reduce the heat and slowly simmer, stirring often, for about 20 minutes, or until the sauce is reduced to about 1 – 1 1/4 cups and lightly thickened. Stir in the lemon juice, salt, and white pepper. Transfer the sauce to a blender and blend until smooth but with some texture still, about 30 seconds; be careful, because the sauce is very hot. Set aside and keep warm.

    To cook the fish, preheat an oven to 450°F. Season the halibut with salt and pepper to taste. Heat the oil in a large, heavy ovenproof skillet over medium-high heat. Cook the fillets until golden brown, about 2 to 3 minutes on each side. Transfer the skillet to the oven and bake the fish until just cooked through, about 3 to 4 minutes, depending on thickness of the fillets.

    To serve, place the fillets on warm plates spoon the sauce over them. Garnish with chives.

    Chef’s Note: Prized halibut cheeks would be a tasty alternative when available. They range in size from 3 ounces to up to 1 pound each, depending on the size of the fish.

    Recipe adapted from Kathy Casey’s Northwest Table.

    Posted by Kathy Casey on May 16th, 2013  |  Comments Off on Farmers Market Local Bounty |  Posted in Dishing with Kathy Casey Blog, Foodie News, KOMO Radio, Lifestyle, Recent Posts, Recipes, seafood

    D’lish Deviled Eggs on New Day Northwest!

    I had a blast with King 5’s Margaret Larson on New Day Northwest earlier this morning talking all about my latest book, D’Lish Deviled Eggs! With over 50 classic and creative recipes, there’s definitely an egg for everyone and every occasion.

    Beet'ing Heart
    Beet’ing Heart Deviled Eggs! Love the color!

    (Photo by Kathy Casey Food Studios from D’Lish Deviled Eggs, Andrews McMeel Publishing)

    Want to know my tips and secrets for how to make the perfect deviled egg? Start by making sure to hard-cook (not boil!) your eggs with my tip below. Then dress your deviled with my tasty variations: Goat Cheese and Peppadew, “California Roll,” and Beet’ing Heart deviled eggs.

    California Roll egg

    Creative way of incorporating sushi into an egg app: “California Roll” Deviled Eggs topped with
    Alaska King Crab, cucumber, furikake and tobiko.
    (Photo by Kathy Casey Food Studios from D’Lish Deviled Eggs, Andrews McMeel Publishing)

    For another fun deviled egg recipe, try my Emerald Asparagus & Sweet Onion Deviled Eggs found in the Seattle Time’s Pacific NW Magazine! Here’s to a wonderful spring season and Easter holiday! -Kathy

    Goat Cheese and Peppadew Eggs
    Creamy goat cheese and tangy sweet Peppadew peppers tango with a hit of Tabasco heat in this sexy deviled egg combo. Topped with a Spanish Marcona almond for a touch of salty crunch, these zippy bites are sure to please everyone’s palate.

    Makes 24

    1 dozen hard-cooked eggs (recipe follows)

    Filling
    3 to 4 ounces chèvre-style goat cheese (about 1/2 cup)
    1/4 cup mayonnaise
    1 1/2 teaspoons Tabasco sauce
    8 Peppadew peppers, drained well and finely chopped (about 1/4 cup)

    Topping
    24 Marcona almonds
    2 tablespoons minced fresh parsley

    Halve the eggs lengthwise and transfer the yolks to a mixing bowl. Set the egg white halves on a platter, cover, and refrigerate.

    With a fork, mash the yolks to a smooth consistency. Add the goat cheese, mayonnaise, Tabasco, and mix until smooth. (You can also do this in a mixing bowl with a whip attachment.) Stir in the peppers.

    Spoon the mixture into a pastry bag fitted with a plain or large star tip, then pipe the mixture evenly into the egg white halves. Or fill eggs with a spoon, dividing filling evenly.

    Top each egg half with a Marcona almond and a sprinkle of parsley.

    Hard-Cooked Eggs

    1 dozen large chicken eggs

    Place the eggs in a large nonreactive saucepan and add cold water to 1 inch above the eggs. Bring to a boil over medium-high heat. Turn off the heat and let the eggs sit for 10 minutes. Remove from the stove and run cool water over the eggs in the pan until they are cooled. When cool, carefully peel them under running water.

    Recipe from D’Lish Deviled Eggs by Kathy Casey, Andrews McMeel Publishing

    “California Roll” Deviled Eggs
    Part of the allure of sushi is the beautiful presentation, and these California-roll-inspired eggs are dressed to impress. The wasabi and avocado filling whips up in no time, so you can spend a little longer making them look like the work of art they are!

    Makes 24

    1 dozen hard-cooked eggs

    Filling
    1/2 ripe avocado
    3 tablespoons mayonnaise
    1 tablespoon purchased wasabi paste (or 1 tablespoon wasabi powder mixed with 1 tablespoon water)
    1/4 teaspoon salt

    Topping
    2 ounces Alaska King Crab meat (about 1/3 to 1/2 cup)
    24 small cucumber fans (see tip)
    Nori komi furikake (sesame seed–seaweed sprinkle)
    2 tablespoons tobiko (flying fish roe)

    Halve the eggs lengthwise and transfer the yolks to a small bowl. Set the egg white halves on a platter, cover, and refrigerate.

    In a mixing bowl, mash the avocado well with a fork, then add the yolks and mash to a smooth consistency. Add the mayonnaise, wasabi paste, and salt, and mix until smooth.

    Spoon the mixture into a pastry bag fitted with a plain or large star tip, then pipe the mixture evenly into the egg white halves. Or fill the eggs with a spoon, dividing the filling evenly.

    Top each egg half with a little crabmeat, a cucumber fan, a sprinkle of furikake, and about 1/4 teaspoon tobiko.

    Tip: To make tiny cucumber fans, quarter a 4-inch piece of English cucumber lengthwise. Then cut each quarter into 18 thin slices—the goal is to get 3 tiny slices per “fan.” See photo for reference.

    Recipe from D’Lish Deviled Eggs by Kathy Casey, Andrews McMeel Publishing

    Beet’ing Heart Deviled Eggs
    I’m all for an appetizer that doubles as a fun craft project, and these eggs certainly fit the bill. Pickled beet juice turns the whites a deep pink color and makes these perfect for serving up on Valentine’s Day or Easter. Kids will love helping turn their eggs pink.

    Makes 24

    1 (15-ounce) can sliced pickled beets
    1/2 cup red wine vinegar
    1/4 cup sugar
    1 dozen hard-cooked eggs

    Filling
    3 tablespoons mayonnaise
    3 tablespoons sour cream
    2 tablespoons stone-ground mustard
    2 tablespoons minced red onion
    1/4 teaspoon sugar
    1/4 teaspoon salt
    Fresh-cracked black pepper

    Topping
    1/4 cup reserved tiny-diced pickled beets, drained well
    2 tablespoons thinly sliced green onion

    To pickle the eggs, drain the beet liquid into a deep medium container and reserve the beets separately. Add the red wine vinegar and sugar to the beet liquid and stir to dissolve the sugar. Peel the hard-cooked eggs and add to the mixture, being sure they are submerged. Cover and let sit for at least 2 hours or overnight, refrigerated. Stir often to color evenly.

    Drain the eggs well, pat dry on paper towels, and discard the beet liquid. Halve the eggs lengthwise and transfer the yolks to a mixing bowl. Set the egg white halves on a platter, cover, and refrigerate.

    To finish the eggs, with a fork, mash the yolks to a smooth consistency. Add the mayonnaise, sour cream, mustard, red onion, sugar, and salt, and mix until smooth. (You can also do this in a mixing bowl with a whip attachment.) Add black pepper to taste.

    Spoon the mixture into a pastry bag fitted with a plain or large star tip, then pipe the mixture evenly into the egg white halves. Or fill the eggs with a spoon, dividing the filling evenly.

    Top each egg half with 1/2 teaspoon of pickled beets and a sprinkle of green onion.

    Tip: For a “polka dot” effect, firmly pack the eggs into a narrow container so that they are all touching, and do not stir them. The eggs will be lighter pink or white where they touch, lending a fun polka dot pattern.

    Recipe from D’Lish Deviled Eggs by Kathy Casey, Andrews McMeel Publishing

    Posted by Kathy Casey on March 27th, 2013  |  Comments Off on D’lish Deviled Eggs on New Day Northwest! |  Posted in appetizers, Books to Cook, breakfast, Dishing with Kathy Casey Blog, Foodie News, Lifestyle, Recent Posts, Recipes, seafood, videos

    D’lish Deviled Eggs

    Anyone who knows me knows that I love deviled eggs. Whenever I show up to a party with a full party platter of them, they are the first thing to fly off the table!

    How much do I love them? Well, I wrote a whole book about them – my new book D’Lish Deviled Eggs features more than 50 classic and creative variations!

    dde cover

    Everyone has their favorite way of making them. I know that grandma’s classic recipe is always a go-to for most people, but these one-bite (maybe two-bite!) apps are the perfect platform to get inspired with!

    From California Roll Deviled Eggs with a filling made with avocado and wasabi topped with crab and cucumber – to sassy Chipotle Eggs to Cheddar and Bacon—there are tons of different takes on the classic and some fun and kitschy variations too. What better way to use up all those hard-boiled eggs after Easter?

    D’lish Deviled Eggs is available in books stores, online and digital. Just think, you’ll have over 50 new ideas for your next party appetizer!

    Web: www.dlishdeviledeggs.com for more fun deviled egg tips and recipes.

    Tweet Tweet: @chickytweets on Twitter!

    So get crackin’ and enjoy some d’lish deviled eggs! –Kathy

    Chipotle Deviled Eggs

    Chipotle Deviled Eggs—yum!
    (Photo © Kathy Casey Food Studios from D’Lish Deviled Eggs)

    Chipotle Deviled Eggs

    I’ve been making these for years and they have become a cocktail-party staple. The spicy tomato topping adds textural and visual pizzazz. Serve these with your favorite margarita for a perfect pairing.

    Makes 24

    1 dozen hard-cooked eggs (recipe follows)

    Filling
    3 Tbsps mayonnaise
    3 Tbsps regular or low-fat sour cream
    1/2 tsp Dijon mustard
    1 to 2 Tbsps chipotle chile purée (see tip)
    1 tsp minced fresh garlic
    1/4 tsp salt
    2 Tbsps thinly sliced green onion

    Topping
    1/2 cup small-diced tomatoes
    1 Tbsp minced white onion
    2 Tbsps chopped fresh cilantro
    1 to 2 tsps chipotle chile purée (see tip)

    Halve the eggs lengthwise and transfer the yolks to a mixing bowl. Set the egg white halves on a platter, cover, and refrigerate.

    With a fork, mash the yolks to a smooth consistency. Add the mayonnaise, sour cream, mustard, chipotle purée, garlic, and salt, and mix until smooth. (You can also do this in a mixing bowl with a whip attachment.) Stir in the green onion.

    Spoon the mixture into a pastry bag fitted with a plain or large star tip, then pipe the mixture evenly into the egg white halves. Or fill the eggs with a spoon, dividing the filling evenly.

    To make the topping, in a small bowl, mix together the tomatoes, onion, cilantro, and chipotle purée. Top each egg half with about 1 tsp of the topping.

    Tip: To make chipotle chile purée, place canned chipotle peppers in adobo sauce, with the sauce, in a food processor or blender and purée until smooth. Freeze any extra purée for another use.

    Hard-Cooked Eggs

    1 dozen large chicken eggs

    Place the eggs in a large nonreactive saucepan and add cold water to 1 inch above the eggs. Bring to a boil over medium-high heat. Turn off the heat and let the eggs sit for 10 minutes. Remove from the stove and run cool water over the eggs in the pan until they are cooled. When cool, carefully peel them under running water.

    Recipe from D’Lish Deviled Eggs by Kathy Casey, Andrews McMeel Publishing

    Posted by Kathy Casey on March 21st, 2013  |  Comments Off on D’lish Deviled Eggs |  Posted in Amazon, appetizers, Books to Cook, breakfast, dessert, Dishing with Kathy Casey Blog, Foodie News, KOMO Radio, poultry, Recent Posts, Recipes, seafood, sides, Snacks
    Untitled