salads

4th of July Weekend Party Pleasers

PICINC_PASTA_SALAD lo res

With the 4th of July right around the corner and picnics and parties to attend everyone is scrambling for a great recipes for pot-luck and party “bring-a-longs”.

Side dishes and salads rule for this kind of thing…from potato salads, macaroni and pasta salads, bread salads… to great planks of zucchini and onions charred on the grill. Just serve up some grilled steaks, portabellas, sausages, chicken, fish or shrimp – ask friends and family to bring the sides and – viola! – instant outdoor party. Add in some shortcake topped with fresh berries (or berries and fresh apricots if you like to mix things up a bit!) and some whipped cream and you have yourself a delicious holiday weekend get-together.

I’ve included in this weeks recipes an “Old School”  Picnic Pasta Salad that is quick and easy and still a crowd pleaser for those traditionalists.  Potato Salad gets a quick re make in my recipe for Pesto Smashed Potato Salad . For the more “gourmet crowd” Then there’s a recipe for my Turkish Tabouli – great with the addition of pistachios and dried apricots and is terrific served up with grilled shrimp or spiced chicken.

Check out my recipes below for some fun ideas for easy potluck sides, perfect for this festive, sparkling and happy holiday!  Pack a picnic and enjoy the fireworks!


“Old School” Picnic Pasta Salad

Always popular pasta salads are best mixed together just far enough in advance so the flavors meld but still stay bright and fresh.

Makes 8 – 10 servings

8 oz dry, small shell pasta
3 Tbsp mayonnaise
1/2 cup high-quality Italian salad dressing
2 cloves garlic, finely minced
1/2 tsp black pepper
1/4 cup chopped parsley
1 cup shredded cheddar cheese
3/4 cup frozen peas, defrosted
1/3 cup small-diced red onion
1 can (2.25 oz) sliced black olives, drained well
1 lb Campari® Cocktail Tomatoes, diced or 1 1/2 halved cherry or grape tomatoes

Cook pasta according to package directions, rinse and drain well.

In a large bowl whisk together the mayonnaise, dressing, garlic and pepper. Gently mix with pasta and remaining ingredients.

Created for Sunset Produce Company by Kathy Casey

Pesto Smashed Potato Salad

Makes 12 or more servings

2 tablespoons minced fresh garlic
1 tablespoon Dijon mustard
1/2 cup minced sweet white onion
1/2 cup olive oil
1/2 cup basil pesto, homemade or purchased
1/4 cup cider vinegar
1 tablespoon kosher salt
1 1/2 teaspoons coarse-ground black pepper

2 1/2 pounds small Yukon Gold potatoes or other fun, local small potatoes found at farmers markets, such as marble potatoes, fingerlings or baby pinks
1/2 cup tiny-diced red bell pepper
1/4 cup chopped Italian parsley
2 tablespoons chopped fresh basil

In a large bowl, whisk together the garlic, mustard, onion, oil, pesto, vinegar, salt and pepper to make the dressing; set aside while continuing with recipe.

Wash potatoes, then steam, whole, till very tender—be sure they are cooked all the way through. Potatoes should take about 17 minutes for small Yukons but time will depend upon size.

When potatoes are cooked, immediately drain, and add potatoes to the bowl of dressing. With a large spoon, lightly mash potatoes—not like mashed potatoes but more to break them up into chunks; the goal is to lightly smash/break open the potatoes. Then add bell pepper, parsley and basil. Fold potatoes into dressing with a large rubber spatula to coat all pieces.

This salad is great served warm or at room temperature. You can make salad the day or morning before serving and then refrigerate. If making ahead, remove from refrigerator 1 hour before serving to bring to room temperature.

Recipe © 2009 by Kathy Casey Food Studios®

Turkish Tabbouleh Salad with Dried Apricots & Pistachios
Makes 8 cups

1 3/4 cups boiling water
2 teaspoons kosher salt (divided)
1 1/2 cups bulgur wheat
6 tablespoons fresh lemon juice
1/4 teaspoon black pepper
1/4 cup extra-virgin olive oil
3 roma tomatoes, diced 1/2 inch
4 green onions, thinly sliced
3/4 cup coarsely chopped dried apricots
3/4 cup shelled pistachios, lightly toasted
1 can (15 1/2 ounces) garbanzo beans, drained
1/4 cup tiny-diced sweet white onion
1/4 cup chopped fresh mint
1/2 cup coarsely chopped flat leaf parsley
1/2 cup coarsely chopped cilantro

In a medium saucepan over high heat, bring water and 1 teaspoon of the salt to a boil, then immediately stir in the bulgur wheat and remove from the heat. Cover and let sit for 1 hour or until all the water has been soaked up.

Uncover and let cool.

In a large bowl, mix together remaining 1 teaspoon of salt, lemon juice, black pepper and olive oil. Then add remaining ingredients and cooled bulgur. Mix together well, until all ingredients are coated with dressing.
Recipe © 2009 by Kathy Casey Food Studios®

Posted by Kathy on July 2nd, 2009  |  Comments Off on 4th of July Weekend Party Pleasers |  Posted in Dishing with Kathy Casey Blog, KOMO Radio, Pasta-Risotto, Recent Posts, Recipes, salads, sides

Fresh, Juicy Strawberries – summer is here!

5-21 KCFS Cookbook Hi Res Finals 047

With summer just a few sunny days away, it’s time to start incorporating summer fruits and nature’s bounty from the farmers markets into our seasonal dishes and drinks.

One of the first signs of summer is sweet, juicy strawberries appearing at the market! They can make anything taste sweet and refreshing, not to mention they can add some great color to any bland dish or drink! Pile them high on shortcake or dip on chocolate for dessert, throw them in a salad with balsamic for dinner or put them to your cocktail to spruse it up a bit!

I have included two of my favorite recipes for summer. First up is the Strawberry Shag Cocktail from my new book Sips & Apps. The Strawberry Shag teams lightly-sugared fresh strawberries with a tasty partner – fresh basil! Shaken with vodka and fresh lemon juice this refreshing cooler is perfect to start any patio party!

Next up is Strawberry & Spinach Salad with Sweet Onions and Poppy Seed–Ginger Vinaigrette which is one of my favorite salad dressing recipes. If you are tight on time you can make the dressing up to 1 week in advance! Serve this d’lish salad as a starter or top it with sliced grilled chicken breast, paired with some hearty, rustic bread for a main meal.

I hope you enjoy my “first of summer” strawberry recipes and be sure to always remember to “Cook up Some Fun” in the kitchen!

Strawberry Shag
Fresh basil lends a fun flavor note to the classic combination of strawberries and lemonade. Soda water introduces a lively sparkle.

Makes 1 drink

1 to 2 large sprigs fresh basil
1/4 cup Sugared Strawberries with juice (recipe follows)
1 1/2 ounces vodka
1 ounce fresh lemon juice
3 to 4 ounces chilled soda water

For garnishing: fresh strawberry, small basil leaf

In a cocktail shaker, press the basil and strawberries together with a muddler to release the basil’s flavor. Fill the shaker with ice. Measure in the vodka and lemon juice. Cap and shake vigorously. Pour into a large glass, top with soda water, and stir. Garnish with a strawberry and basil leaf.


Sugared Strawberries
Makes enough for about 6 drinks

1 pint fresh strawberries, stemmed and thinly sliced
1 1/2 cups powdered sugar

Mix the ingredients and let sit for 15 minutes before using.

Recipe from Sips & Apps, Chronicle Books, San Francisco. Copyright © 2009 by Kathy Casey


Strawberry & Spinach Salad
with Sweet Onions and Poppy Seed–Ginger Vinaigrette

Makes 6 to 8 servings

Vinaigrette
1/4 cup white wine vinegar
1 tablespoon minced peeled fresh ginger
2 tablespoons Dijon mustard
3 tablespoons honey
2 tablespoons sugar
1/2 teaspoon salt
1/4 teaspoon black pepper
1/3 cup light olive oil or other salad oil
2 teaspoons poppy seed

Salad
3 cups fresh strawberries, stemmed and quartered
2 bunches spinach, stemmed, washed well, and spun dry
    (or 8 to 10 cups of baby spinach leaves)
1/2 cup thinly sliced sweet white onion, such as a Walla Walla Sweet or Vidalia
1/2 cup sliced almonds, toasted

To make the vinaigrette, whisk the vinegar, ginger, mustard, honey, sugar, salt, and pepper in a medium bowl. Gradually whisk in the oil, emulsifying the vinaigrette. Stir in the poppy seed. Refrigerate for up to one week.

To make the salad, toss the berries, spinach, and onion with the vinaigrette. Sprinkle with almonds.
Recipe adapted from Kathy Casey’s Northwest Table, Chronicle Books, San Francisco. Copyright © 2006 by Kathy Casey.

Posted by Kathy on June 4th, 2009  |  Comments Off on Fresh, Juicy Strawberries – summer is here! |  Posted in Cocktails, Dishing with Kathy Casey Blog, Recent Posts, Recipes, salads

Confessions of a Potato Salad Purist

by Guest Blogger Chef Cameo McRoberts


 ‘Tis the season to reinvent the potato salad. A picnic staple that heats the debate over ‘classic’ versus ‘contemporary’ as much as blue jeans and the little black dress.  Potato salad could be coined the “carbo-loaded fashionista” of the summer BBQ runway.  Each season it is reinvented, time and again. The Donna Reed, red checker style with yellow mustard and egg –  the Heidi Klum, German potato spiked with vinegar and  pork fat –or the Selma Hyak, loaded with  chilies and Latin flair.


Foundations may vary as much accessories, be it red bliss, Yukon, russet, sweet, purple, baked, boiled or steamed. Properly cooked potatoes make all the difference: creamy throughout but not overcooked. Keep it cool at parties! Keep in mind that the starches in potatoes can be as harmful as the mayo when heated by the sun. 


Trends come and go but the important thing to remember is construction and style is the true test of a well-dressed salad.  Let your salad drink up the dressing and season it well. 


For fear of dragging out the fashonista analogy any longer, remember to play to your audience and the occasion: for family picnics stick with a classic but do it with charm and finesse, for a BBQ with friends try out the newest potato on the block by zesting up your pots with curry and fresh herbs.  But don’t over do it! Like Coco Channel says, the secret to accessorizing is to take one thing off before you leave the house. Here’s to a summer full of good cheer, good taste, lots of sunscreen and not ending up on the ‘worst dressed’ list.


————————————————–

Thanks Cameo for a fun blog on a summer classic. I love old school “mom-style” super mayo laden potato salad – but to the waistline, it’s not so friendly! So for a tasty potato salad that will keep you looking at your fashionable best here is one of my favorite potato salad recipes – a great mayo’less salad to take or serve at any outdoor get together. – Kathy


Summer Garden Potato Salad with Feta Vinaigrette

You’ll want to dress your potatoes while still warm to soak up all the dressing! This is a great salad to serve as a side-kick to grilled chicken, steak or fish.


Makes 8 cups


2 pounds red potatoes, cut in 1-inch pieces (about 6 cups)

2 tablespoons red wine vinegar

1/4 cup extra virgin olive oil

1 tablespoon Dijon mustard

2 tablespoons chopped fresh oregano

1/2 teaspoon Kosher salt

1/4 teaspoon coarse ground black pepper

1/2 cup halved pitted calamata olives

1 cucumber, peeled, seeded and diced

1/2 cup chopped roasted red peppers (or sub fresh peppers)

1 small green pepper, diced

1/2 cup finely diced red or sweet white onion

4 ounces feta cheese, crumbled (about 1 cup crumbled cheese)

1/4 cup chopped fresh Italian parsley


Steam potatoes until very tender, about 12 – 14 minutes.


Meanwhile, in a large bowl make the dressing by whisking together the vinegar, olive oil, Dijon, oregano, salt and pepper.


When potatoes are still warm, toss them with the dressing and set aside until cool, then stir in the remaining ingredients.


Copyright © 2009 Kathy Casey Food Studios


Posted by Kathy on May 28th, 2009  |  Comments Off on Confessions of a Potato Salad Purist |  Posted in Dishing with Kathy Casey Blog, Recent Posts, salads, sides

Spring Brunch Ideas and What to do with those Easter Eggs?

Easter is such a festive holiday – it is religious to some and a welcoming of spring to others. In the days past it was a time for new pastel dresses and flowery hats and shiny patent shoes.

The egg hunt is still my favorite! But what to do with all those found eggs?? Egg Salad Sandwiches, Deviled Eggs (my favorite recipe is below!), Cobb Salad, Potato or Pasta Salad.

Follow the egg hunt with a delicious brunch on this special Sunday enjoyed with your favorite friends and family.

For your brunch be sure to pick a menu that includes items you can make in advance so that you can enjoy the day. Buffet is the way to go! Set out a beautiful fruit salad drizzled with fresh lime juice mixed with a little honey and spike with some chopped mint. Accompany with Denver Breakfast Bake for a Crowd (a baked savory bread pudding like dish that you can prep the day beore and bake the morning of your party) and some grilled, fresh, first of the season asparagus. Quick, easy and delicious! Then move on to an afternoon of lounging conversation – what a way to welcome the coming of spring.

And for those celebrating the Jewish holiday of Passover this week my friend Jamie Peha has these suggestions for brunch: Matzo Brei (said Bry) A traditional dish for Passover brunch, this easy egg and matzo fry can be made sweet, topped with cinnamon sugar or jelly, or savory, with additions of your favorite vegetables and fresh herbs or or Farfel (Matzoh and egg dumplings – deep fried and served with Syrup or cinammon/sugar). Check out Martha Stewart for some great passover brunch ideas on her site.

Denver” Breakfast Bake for a Crowd
serves 6 – 8

2 Tbsp. butter or olive oil
3/4 cup diced onion
1 1/2 cups chopped, mixed red and green bell peppers
1 Tbsp. minced fresh garlic
8 eggs
3 cups half & half
1 tsp. salt
1/4 tsp. black pepper
8 cups 1-inch-diced hearty French bread
1 1/2 cups chopped ham
2 cups (8 ounces) coarsely grated cheddar cheese
1/2 cup grated Parmesan cheese

In a large sauté pan heat the butter or olive oil over medium-high heat. Add the onions and peppers and sauté until three-quarters cooked, about 4 minutes. Add the garlic and cook for 30 seconds more. Remove from heat and set aside.

In a large bowl whisk together the eggs, half & half, salt and pepper until well combined. Add the bread, ham, cooled vegetable mixture, cheddar cheese and half of the Parmesan cheese. Place in an 11 x 13-inch baking pan. Sprinkle the remaining Parmesan over the top, and let sit, refrigerated, at least 1 hour or preferably overnight, so that bread soaks up egg mixture.

When ready to serve, bake in a preheated 350-degree oven for approximately 45 – 50 minutes or until puffy and golden and a knife inserted in the center comes out clean.
© 2009 Kathy Casey Food Studios

Chipotle Deviled Eggs
Makes 24 stuffed eggs


1 dozen large eggs

3 tablespoons regular or low-fat sour cream

3 tablespoons mayonnaise

1/2 teaspoon salt

1/2 teaspoon Dijon mustard, optional

1 to 2 tablespoons chipotle chile purée*

1 teaspoon minced garlic

2 tablespoons very thinly sliced green onion


Topping

1/2 cup diced (1/4-inch) tomatoes

1 tablespoon minced white onion

2 tablespoons minced fresh cilantro

1 to 2 teaspoons chipotle chile purée*


Place eggs in a saucepan and cover with cool water to 1 inch above eggs. Bring to a boil over medium-high heat, then 10 minutes. After eggs have cooked for 10 minutes, remove from the heat and run cool water over them. When eggs are cool, carefully peel under running water.


Cut the eggs in half lengthwise and remove the yolks to a mixing bowl. Set the egg white halves on a platter, cover, and refrigerate.


Mash the yolks to a smooth consistency with a fork or potato masher. Mix in the sour cream, mayonnaise, salt, mustard, 1 to 2 tablespoons chipotle purée, and garlic until smooth. Stir in the green onions. Spoon the yolk mixture into a pastry bag fitted with a plain or large star tip and then squeeze (pipe) the mixture evenly into the egg white halves.


To make the topping: In a small bowl, mix together tomatoes, onion, cilantro, and chipotle purée. Top each egg half with 1 teaspoon of the tomato mixture.


*To make chipotle purée: Place 1 can of chipotle peppers in adobo sauce in blender and purée until smooth. Freeze any remaining purée for another use.


Recipe from Dishing with Kathy Casey: Food, Fun & Cocktails from Seattle’s Culinary Diva, Sasquatch Books, Seattle. Copyright © 2002 by Kathy Casey.


Posted by Kathy on April 9th, 2009  |  Comments Off on Spring Brunch Ideas and What to do with those Easter Eggs? |  Posted in appetizers, breakfast, Dishing with Kathy Casey Blog, KOMO Radio, other, Recent Posts, Recipes, salads

Totally Nuts!

People all over the world delight in eating them roasted, raw and ground. We enjoy them out of hand and in a wide variety of sweet and savory foods; from breakfast to snacks to dinner to desserts.

Nuts are dry fruits or seeds that generally consist of an edible kernel enclosed in a shell. Nuts are sold with and without shells, in a variety of forms, blanched or not, raw, dry- or oil-roasted, with or without salt, chopped, sliced, ground as in butters or flours, and pressed to make oils. You’ll want to store nuts in cool, dry conditions, in airtight containers and away from light. Because of their high fat content, many benefit from storage in the refrigerator or freezer to deter rancidity.

Nuts show up in a variety of ways. As nut butters and nut flours, or as nut oil, long associated with “gourmet” salads. And of course, as whole or pieces- raw or toasted. And there are a plethora of different kinds of nuts to enjoy. Almonds, which have the largest share of the nut trade worldwide, are a great source of quick protein when just eaten out of hand. Walnuts shine in baked goodies. Cashews seem always to be the first to disappear from the party nut mix! Pistachios which are a little more on the exotic side are lovely toasted and sprinkled over a fruit salad. Hazelnuts are fantastic to crust a lovely piece of fish with.

And then there is the ever-loved peanut. Not really a “nut;” actually a legume that buries its “peas” underground – but we all consider it to be in the “nut family”. The classic combo of peanut and chocolate combine in the following recipe for Chocolate Peanut Fudge Cakes with Peanut Butter Cream  —  Yum!

CHOCOLATE PEANUT FUDGE CAKES WITH PEANUT BUTTER CREAM
Makes 6 individual cakes.

Cakes

4 ounces unsweetened chocolate
1 1/2 sticks butter (6 oz. wt.)
1/4 cup creamy peanut butter
4 large eggs
1/2 cup flour
2 cups sugar
1 teaspoon vanilla extract
1 cup dry roasted peanuts, coarsely chopped (unsalted)

Cream

1/2 cup heavy cream
2 tablespoons creamy peanut butter
2 tablespoons powdered sugar

Preheat oven to 350 degrees F.

To make the cakes: Combine chocolate, butter and peanut butter in a metal bowl and place over a pot of just simmering water, or use a double boiler. Stir till chocolate and butter are just melted. Set aside.

In a mixing bowl mix eggs, flour, sugar and vanilla extract until glossy, about 2 minutes.

Mix in melted chocolate and butter mixture until just combined. Then stir in peanuts.

Lightly, pan-spray and flour over-sized muffin pans (Texas Style). Divide batter into the 6 cups.

Bake in the preheated oven for about 34 minutes. Cakes will be slightly gooey in the center. Let cool in pans for 8 minutes then unpan and cool right-side-up on a wire rack.

To make the cream: Place cream, peanut butter and powdered sugar in a bowl and whip until just soft peaked.

To serve cakes: Serve cakes while still warm, or totally cool them and individually wrap in plastic wrap until needed. (Cakes keep this way for up to 4 days.) Serve at room temperature or warm just slightly in microwave for about 20 – 30 seconds on high power or until just warm. Serve topped with a dollop of the peanut cream.

©Copyright 2009 by Kathy Casey Food Studios®

Posted by Kathy on February 19th, 2009  |  Comments Off on Totally Nuts! |  Posted in dessert, Dishing with Kathy Casey Blog, KOMO Radio, Recent Posts, Recipes, salads

Dishing up…”The Basics”

Not everyone knows how to cook—but most would like to! I’ll sometimes whip up a little vinaigrette at friends’ houses when invited for dinner, and it seems that, more often than not, they say, “Wow! How did you make that? what went in there? the ingredients are in my kitchen??”

So for this weeks blog, I thought I would write about three great things for beginning cooks to learn how to make. And it happens that a nice simple meal can be built around these: a vinaigrette, a marinade and a pound cake.

We’ll start with the vinaigrette. Contrary to the “standard” measurements for it—which in my opinion are too oily for today’s palate, I prefer to do 1 part vinegar to 2 1/2 to 3 parts oil. The vinegar and oil can be any kind. Other essentials to me are a small dollop of Dijon mustard, a big pinch of kosher salt, and some pepper. Those are the fundamentals, and from there you can get creative. Add a pinch of sugar or a drizzle of honey if you like it sweet. Add some garlic, lemon zest and a squeeze of citrus if you wish. Try adding grainy mustard or some chopped fresh herbs or a pinch of ground spice, such as cumin or coriander; or some chipotle chili powder and lime juice if you’re wanting a Latin influence. If Greek is your gig for the evening, toss in feta cheese, fresh oregano, chopped olives and lemon juice. Italian? Fresh basil, a dash of grated Parmesan, and extra-virgin olive oil for the oil. You get the picture. It’s just the basics and then you twist them to your taste! I have prepared a handy chart that you can use as your vinaigrette guide to get you started.

Next, there’s marinade. This is an herb marinade to use when you are grilling. And, yes, it is very similar to a vinaigrette! But, again, you can vary the flavorings. When marinating, let’s say, a beef steak or a lamb chop, I prefer to make a fairly thick marinade and leave it on for at least thirty minutes before cooking.If you are marinating overnight—which is great if you are planning that far in advance, you must do it in the refrigerator. For meat items, such as beef, pork or lamb, I bring them to room temperature—still in the marinade—for one hour before cooking, to take the chill off. Chicken can come out 30 minutes before cooking and fish 15 minutes. You can clip out these basics to post on your fridge.

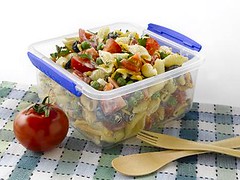
If you are a very beginner cook, serve the grilled meat with some veggies and maybe a starch, such as rice or potatoes. But if you’re timid in that area, then just serve a big salad tossed with your vinaigrette dressing and put lots of fresh veggies in it.

Then there’s dessert—the pound cake. The old-school method for this cake is one pound of butter, one pound of flour, one pound of sugar and one pound of eggs. In an updated version, I tweaked the basic ingredients and gave a slew of ideas for add ins and variations, such as chocolate chips, lemon or orange zest, fresh ginger, lavender—the choices are numerous. This is a delicious cake to serve as is or with fresh fruit and a dollop of whipped cream. It also makes for a tasty morning brunch treat.

So I hope these three simple recipes will inspire those of you who are just starting out in the kitchen to try your hand and those of you who are already practiced at cooking to do your own creative twists with these basics.

Vinaigrette Basics

Acid: 1/4 cup of any of the following or a combination equaling 1/4 cup
lemon juice, lime juice, cider vinegar, balsamic vinegar
red wine vinegar, white wine vinegar, rice wine vinegar
Plus Add:
2 teaspoons Dijon mustard
3/4 teaspoon Kosher salt (use less if adding cheese or olives)
Oil: 3/4 cup Any of the following or a combination equaling 3/4 cup
mild-tasting vegetable oil, such as canola, olive oil, extra-virgin olive oil
nut oils, such as hazelnut or walnut oil (do not use nut oils for more than half of total oil)
Flavorings: as desired
black pepper, pinch of cayenne pepper
1 tablespoon grated lemon, lime or orange zest (colored part only—no white pith)
1 tablespoon chopped mild fresh herbs (basil, tarragon, chives, oregano, cilantro)
1 1/2 teaspoons chopped strong fresh herbs (thyme, rosemary, marjoram)
2 to 3 tablespoons grated parmesan cheese, crumbled blue cheese or feta cheese
2 tablespoons chopped calamata olives, sun dried tomatoes or roasted peppers
2 to 3 teaspoons finely minced fresh garlic
2 to 3 teaspoons finely minced fresh ginger
1 tablespoon honey
2 teaspoons sugar
2 teaspoons poppy seeds
1 tablespoon Asian-style sesame oil
1 tablespoon toasted sesame seeds
1 tablespoon finely minced shallots
2 tablespoons thinly sliced green onions
1 teaspoon hot chili paste or hot sauce

With a small wire whisk, in a small bowl, whisk together your acid component, Dijon mustard and salt. Then slowly whisk in the oil, adding it in a thin drizzle. This technique is to emulsify (make smooth and combined) your dressing. Then add your flavoring components. You can keep the vinaigrette refrigerated for up to 2 weeks. Whisk up well before each use. Toss with your favorite greens. Experiment with different flavorings and combinations for your vinaigrette. Also try out various greens and salad additions, such as nuts, fruits, cheeses, meats and seafood. ©2009 by Kathy Casey Food Studios®

Basic Marinade for Grilling
Marinates 4 to 6 portions of protein

2 tablespoons fresh lemon juice
1 tablespoon minced fresh rosemary or other fresh herb
1 tablespoon Dijon mustard
1 tablespoon finely minced garlic
1/3 cup olive oil or salad oil, depending upon which herbs you are using
1/2 teaspoon coarse-ground black pepper or 1/4 teaspoon red chili flakes

4 to 6 portions of protein, such as chicken breasts, steaks, pork loin chops, salmon, or large shrimp, or large portobello mushrooms for a vegetarian option

In a small bowl, whisk together all marinade ingredients. Lay out protein in a shallow, non-aluminum baking pan. Spoon half the marinade on the top side of each portion and rub it around, then flip the protein and spoon on the remaining marinade, being sure that all surfaces are covered. Cover pan with plastic wrap and refrigerate for at least 30 minutes or up to overnight.

When ready to cook, heat grill to medium-high heat, then brush grill lightly with oil. Be sure grill is hot before placing protein on it. Sprinkle both sides of protein with kosher salt, and grill on the first side, being sure not to move it until there is a good charred grill mark. (The biggest mistake that home cooks make is to “touch” what they are grilling too much and move it around before it is ready; this causes sticking.)

Grill to desired doneness. No specific time can be given as it will depend upon your heat and what you are grilling. Typically, if there are nice grill marks on each side, the food is probably close to done. You can refer to internal cooking temperatures on the Internet, but I think that most government-determined temperatures are too high. So, until you are a seasoned griller, get a small paring knife and cut a tiny “peek “into the center of what you are cooking. For poultry you will want to see no pink; fish should be just cooked and not dry; shrimp should be just pink on the outside and barely opaque inside; and steaks should be the way you like them!

This marinade is a basic one, so get creative here, too, when you feel ready. Practice makes perfect. And grilling is “rustic,” so if you make a mistake, it is not the end of the world—just jump back in and try it again soon. ©2009 by Kathy Casey Food Studios®

Simple Vanilla Pound Cake
Makes 1 cake, 10 to 12 generous slices

2 cups all-purpose flour, measured by the scoop and sweep (level off with a straight edge) method
1 1/2 teaspoons baking powder
8 ounces (2 sticks ) butter (I like to use salted for that little flavor boost), at cool room temperature
1 1/4 cups sugar
4 eggs
1 1/2 teaspoons real vanilla extract
extra flavor “goodies” (see Chef’s Notes, below)

Preheat an oven to 325 degrees F.

In a small bowl, sift together the flour and baking powder. (But sometimes I just stick these in a bowl, whisk them together to incorporate the baking powder, and forget the sifting!) These are the “dry ingredients.” Set aside.

“Prepare” a 9-by-5-by-3-inch loaf pan by greasing or pan-spraying first and then lightly dusting with flour. Tap out any excess flour.

In an electric mixer, combine butter and sugar and mix with beater attachment on medium speed for about 2 minutes, or until fluffy. This is called “creaming.” Halfway through mixing, stop mixer and scrape down the sides of the bowl with a rubber spatula,

being sure to get down to the bottom of the bowl, too. Next, add eggs and vanilla and mix on medium-high speed for 1 minute. When the eggs and vanilla are beaten in, stop the mixer and add half of the dry ingredients into the creamed mixture. Turn mixer on slow speed just until flour is incorporated, then raise speed to medium and mix for 30 seconds. Turn off mixer and add remaining dry ingredients. Turn mixer on slow to incorporate flour, then raise speed to medium and mix for 1 minute.

If you are adding flavorings and “goodies,” such as lemon peel, chocolate chips, lavender, etc., now is the time to stir them in. With rubber spatula, scrape the batter into the prepared pan, being sure batter fills all the corners. Smooth out batter on the top and then tap pan sharply on the counter to release any air bubbles.

Bake in preheated oven for about 1 hour and 5 minutes or until a cake tester—or bamboo skewer or toothpick—inserted into the center comes out “clean.” This means that there is not a bunch of gooey batter stuck to the skewer and it is not wet to the touch. If there is, then bake cake for 5 to 10 minutes more until the tester comes out clean. Halfway through the baking time, carefully rotate the pan in case there are hotter or colder zones in your oven. Ovens vary and home baking is not an exact science, so use your best judgment on cooking time. When done, this cake will be rich golden brown on top and slightly coming away from the edges of the pan.

Remove cake from the oven and let it “rest” on a rack for 5 to 10 minutes. Then slide a paring knife around the sides to help loosen the cake, and turn cake out onto rack to cool for at least 30 minutes before serving. To serve, slice cake (I prefer to use a serrated knife) into 3/4- to 1-inch thick slices and top with seasonal fresh fruit, such as berries or peaches. Other options are whipped cream and ice cream … or just eat it plain!

Chef’s Notes: Try adding any of the following or combinations. Just use your creative juices and experiment, but keep the total additions to 1/2 cup or less!
2 tablespoons finely grated lemon or orange zest (colored peel only, no white pith)]
1/2 cup mini chocolate chips
1/4 cup chopped candied ginger
2 teaspoons dried lavender flowers
1/3 – 1/2 cup chopped dried fruits, such as cranberries, candied pineapple, mango, etc. (pre-soak fruit in 2 tablespoons of water)
1/2 cup chopped nuts, such as almonds, hazelnuts or walnuts
©2009 by Kathy Casey Food Studios®

Posted by Kathy on February 12th, 2009  |  Comments Off on Dishing up…”The Basics” |  Posted in dessert, Dishing with Kathy Casey Blog, KOMO Radio, Lifestyle, meats, other, poultry, Recipes, salads, seafood

Glorious Garlic

Glorious Garlic
I always wonder, what is WRONG with those people who are always talking bad about garlic breath? In my opinion there is absolutely nothing wrong with “a little” garlic breath – except maybe if you are the only one in a group who hasn’t overindulged.

Garlic is the bulb of a perennial plant that is native to Asia. A member of the lily family and a cousin of the onion, this flavor-packing bulb has been used in culinary preparations dating back to Old Testament times. And as far as I know garlic is used in just about every cuisine. Garlic is stuffed into olives for Gartinis (garlic martinis), roasted till squishy and smeared on bread, sliced paper thin for stir fries and pastas… I’ve even had it slow-cooked in sugar syrup until candied and then dipped in chocolate! No matter how you cook, slice, and eat it, garlic always gives a great flavor hit.

And not only does it taste great, it is also really good for you. Claims made for it include helping to prevent heart disease and to prevent free radical formation. And some even proclaim it helps to ward off a cold by stimulating the immune system … not bad for such a stinky little friend. Why it is even reported that Egyptian slaves ate garlic for strength as they built the great pyramids!

Roasted garlic is super- scrumptious, but it often takes quite a bit of time to roast it whole-head-style. So, I’ve got a great quickie option for you — Easy Stove Top Roasted Garlic in Oil. This method takes about 10 minutes from start to finish and is done by simmering peeled garlic cloves in olive oil on the stovetop. The results are nice, squishy, light golden cloves and delicious garlic-flavored oil. (Just remember when storing any garlic in oil that it is imperative to refrigerate it.)I have whisked up a luscious Roasted Garlic Creamy Herb Salad Dressing that uses the Easy Stove Top Roasted Garlic and its flavorful oil. Just the thing to toss with a spinach, bacon and tomato salad.

Eat garlic, breathe deep and live free ….

Roasted Garlic Creamy Herb Salad Dressing
Makes 1 ¼ cups
2/3 cup (1 recipe) Easy Stove Top Roasted Garlic in Oil (recipe follows)
1 ½ teaspoons Dijon mustard
¼ cup tarragon vinegar
6 tablespoons mayonnaise
2 teaspoons minced fresh basil
1 tablespoon minced fresh chives
½ teaspoon salt
¼ teaspoon black pepper
½ teaspoon sugar
In a small bowl whisk all ingredients together until well combined. Copyright 2008 by Kathy Casey.

Easy Stove Top Roasted Garlic in Oil
Use garlic and oil in your favorite recipes where you would add garlic. Also great to dip in, and to smear on your favorite rustic bread!
Makes 2/3 cup

1/2 cup peeled garlic cloves
1/2 cup olive oil

Place the garlic and oil in a very small saucepan. Place on medium-high heat and bring to a slow simmer, then reduce heat to low so oil is just barely simmering. Continue to simmer for about 5 – 7 minutes, turning garlic pieces from time to time, or until the garlic is very soft, and very, very lightly browned. (Cooking time will vary with your stove.) Remove garlic to a plate to cool. Reserve and cool oil.

After oil and garlic are cool, chop garlic very coarsely and stir back into the oil. Cover and keep refrigerated up to 7 days. Copyright 2008 by Kathy Casey.

Posted by Kathy on January 7th, 2009  |  Comments Off on Glorious Garlic |  Posted in Dishing with Kathy Casey Blog, KOMO Radio, other, salads

Great Seattle Parks for Picnics

Seattle summer weather is perfect for picnics and this weekend looks like it won’t disappoint. There are so many great Seattle parks for picnics: Golden Gardens is the Classic, but there are beautiful views from Volunteer park, Gasworks and Discovery park.

While it is just fine to show up with some friends, blanket and basket in tow, you’ll have to make a reservation if you want to use any of the park’s shelters or hibachis. Reservations fill up fast and there is a fee. Click here for that information.

When I go on a picnic, I like to take along a variety of easy to eat small plates. Think grain salads, or pressed sandwiches, presliced cheeses, crackers, and veggies and dip. What you don’t want are mayo based salads that can get soggy or can cause illness if unattended to or improperly handled. Yuck!

I hope you’ll try my recipe for Curried Orzo Spinach Salad and hit the parks this weekend for great outdoor dining!

Curried Orzo Spinach Salad
Makes 8 – 12 servings

1/3 cup red wine vinegar
1 tablespoon Dijon mustard
2 tablespoons sugar
2 teaspoons kosher salt
1 1/2 teaspoons curry powder
1 teaspoon hot sauce
2 teaspoons minced garlic
1/3 cup sour cream or yogurt
3 tablespoons vegetable oil
1/2 teaspoon freshly ground black pepper
1 pound (about 2 cups) dry orzo pasta
1 bunch fresh spinach, cleaned and cut in 1/2-inch pieces
2 tablespoons coarsely chopped fresh cilantro
1 large yellow bell pepper, diced small
1 large red bell pepper, diced small
1/2 cup tiny-diced red onions
3/4 cup shelled pistachios, coarsely chopped
3/4 cup small-diced dried apricots

In a large bowl, whisk together vinegar, mustard, sugar, salt, curry powder, hot sauce, garlic, sour cream, oil, and black pepper. Reserve.

Meanwhile, cook orzo according to package directions or until al dente. Drain but do not rinse. While pasta is still fairly warm, toss it with the reserved dressing. Let mixture totally cool, then toss in remaining ingredients. Serve immediately, or cover and refrigerate if made ahead. Salad can be made up to 24 hours in advance.

© 2004 Kathy Casey Food Studios®

Posted by Kathy on August 14th, 2008  |  Comments Off on Great Seattle Parks for Picnics |  Posted in Dishing with Kathy Casey Blog, KOMO Radio, Recent Posts, salads, sides
Untitled